

In this article we will show you how to disable Settings and Control Panel in Windows 10.

Most Windows 10 users will never need to block or disable the Settings app and classic Control Panel. If you have a guest on your computer and don't want them to mess with your Windows settings, you can always create a standard user account with reduced privileges.
However, in some cases, you may want to disable or block the Settings app and Control Panel. For example, when you don't want to create another user account, but you want to prevent your guest from making changes to your computer's custom or default settings.
Windows 10 doesn't offer an easy way to disable Control Panel and Settings. To do this, you'll need to go to Group Policy or the Windows Registry.
Follow the instructions below to enable or disable Settings and Control Panel in Windows 10.
Method 1 – Via Group Policy
Note that the Group Policy Editor is not part of the Windows 10 Home edition, which means you cannot use Group Policy to enable or disable Settings and Control Panel on the Home edition. If you have Home, then use Method 2 of this guide (Registry method).
Step 1: Open the Group Policy Editor. To open it, type the name “Group Policy Editor” in the Start search field and click the correct search result.
Step 2: In the Local Group Policy Editor window, go to “User Settings > Administrative Templates > Control Panel.” On the right side, look for “Deny access to Control Panel and Computer Settings,” and then double-click on it to open its properties.
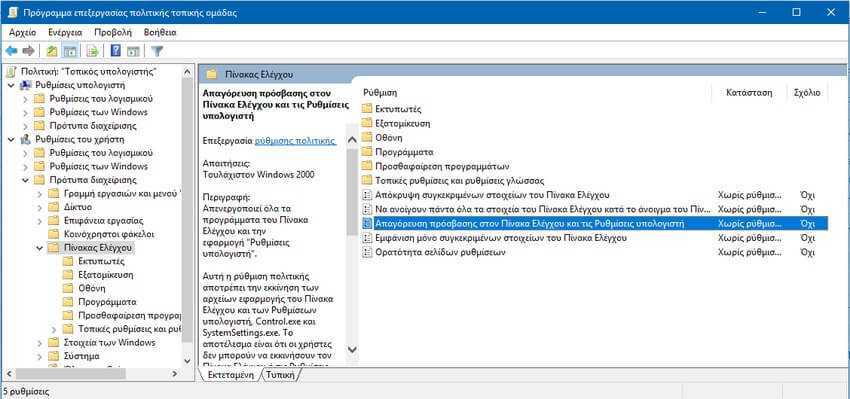
Step 3: Select the “Enabled” option to disable or block Settings and Control Panel. Click the Apply button.
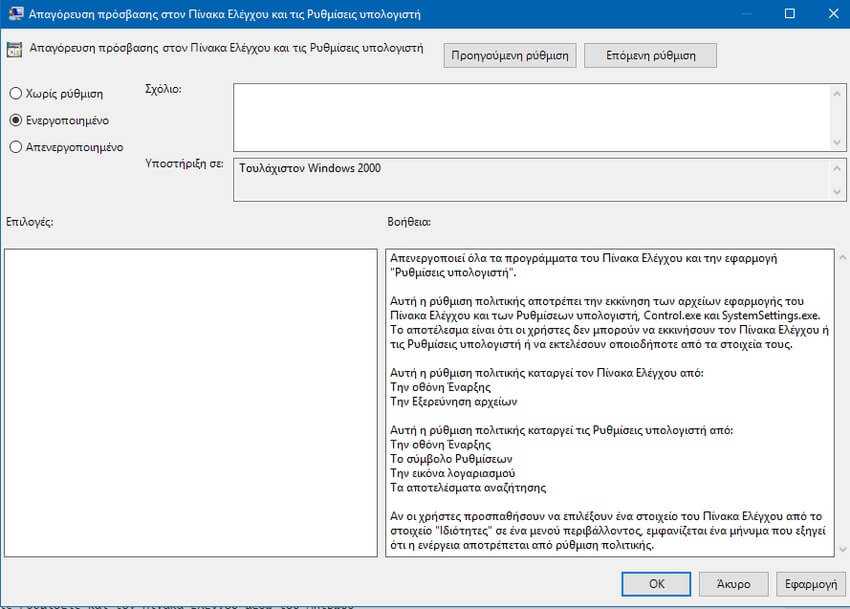
To re-enable Settings and Control Panel, select the “No settings” option. Click the Apply button.
Method 2 – Through the Registry
Step 1: Type Regedit in the Start search field, then select regedit.exe and press the Enter key.
Click Yes if you see a window asking if you want to allow the registry editor application to make changes to your device.
Step 2: Navigate to the following address: Computer\HKEY_CURRENT_USER\SOFTWARE\Microsoft\Windows\CurrentVersion\Policies\Explorer
Step 3: On the right-side, right-click on an empty spot, click on the “Create” button, click on “DWORD (32-bit) Value” and then name it as NoControlPanel.
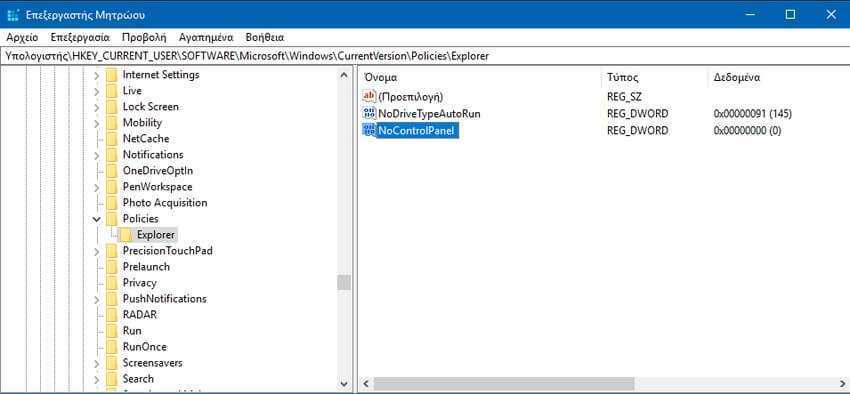
Step 4: Finally, double-click on the NoControlPanel value, and then set the value data to 1 to disable or block Control Panel and Settings.
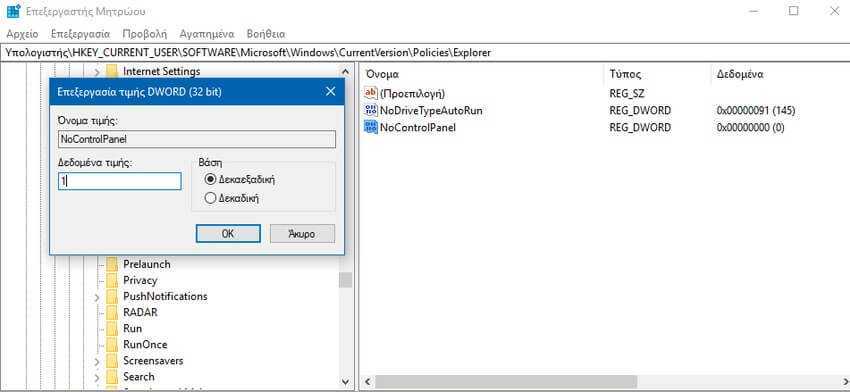
Set the value to 0 or delete the NoControlPanel value to enable both the Control Panel and Settings apps in Windows 10.
