

Airplane mode disables all wireless communications on your Windows 11 computer, which is convenient during a flight or when you simply want to disconnect from the network. See how you can enable and disable it.
See also: Firefox overrides Windows 11 default browser settings
Enable or disable airplane mode in Quick Settings
One of the fastest ways to enable or disable airplane mode in Windows 11 is via the Quick Settings menu. To open it, click the sound and Wi‑Fi icons in the lower‑right corner of the taskbar next to the clock or press Windows+a on your keyboard.
When it opens, click the “Airplane Mode” button to enable or disable airplane mode.
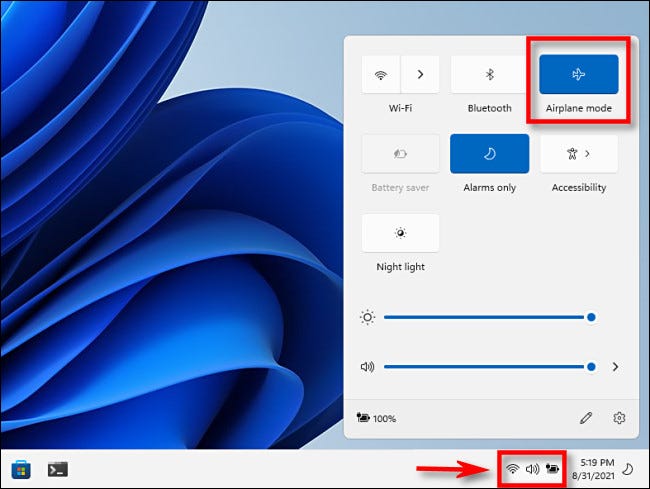
If you don't see the Airplane Mode button in the Quick Settings menu, click the pencil icon at the bottom of the menu, select “Add” and then select it from the list that appears.
See also: Will Windows 11 support Android apps for Xbox?
Enable or disable Airplane Mode in Settings
You can also enable or disable the airplane mode from the Windows Settings app. To do this, open Settings by pressing Windows+i on your keyboard. In Settings, go to “Network & Internet” and then click the switch next to “Airplane Mode” to enable or disable it.
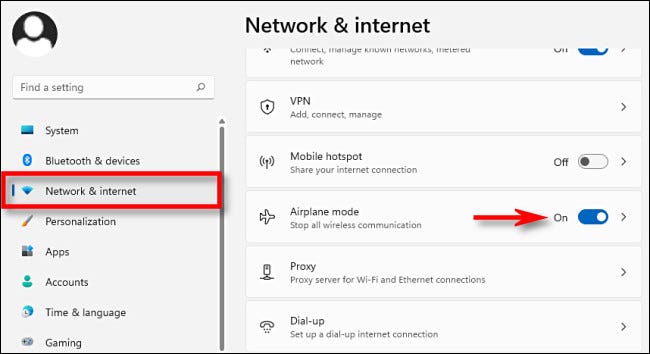
If you click the side edge (arrow) next to the switch, you can fine‑tune whether you want to disable only Wi‑Fi or Bluetooth, or even re‑enable Wi‑Fi after turning on airplane mode.
See also: Windows 11: How to change your screen brightness?
Turn on or off airplane mode using a physical button
On many laptops, some tablets , and some desktop keyboards, you may find a dedicated button, switch, or key that toggles airplane mode. Sometimes it's a switch on the side of a laptop that can turn all wireless features on or off. Or sometimes it's a key with an "i" or a radio tower and lots of waves around it, like on the Acer laptop pictured below.
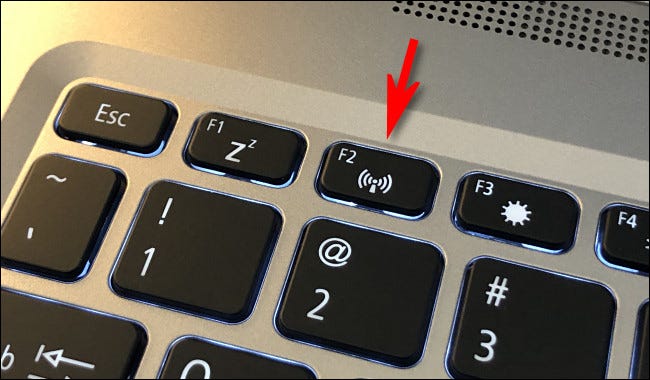
Ultimately, you will need to consult your device's manual to find the correct button, but logically you should look for an icon that looks like radiating waves or something similar. Good luck!
Information source: howtogeek.com
