

Every time you press the “Delete” key on your keyboard, Windows moves the file from its actual location to the Recycle Bin. This behavior helps you recover the file or folder if you have accidentally deleted it. However, over time, the number of files and folders in the Recycle Bin increases, which consumes a lot of space on your C drive.

Of course, you can easily reclaim this lost space by simply emptying the Recycle Bin. But if you frequently use the Delete key and delete a lot of files, whether at work or at home, then it's a good idea to automatically empty the Recycle Bin at set intervals. See below for how you can schedule it.
There are many ways to automatically clean the Windows Recycle Bin, such as using a standalone third-party program, using the built-in Disk Cleanup utility, etc. However, today we will show you a simple and effective way that uses the Task Scheduler and the Command Prompt.
Step 1: To get started, search for “Task Scheduler” from the Windows and open it. Alternatively, you can also press Win + R keys simultaneously and in the run window type taskschd.msc
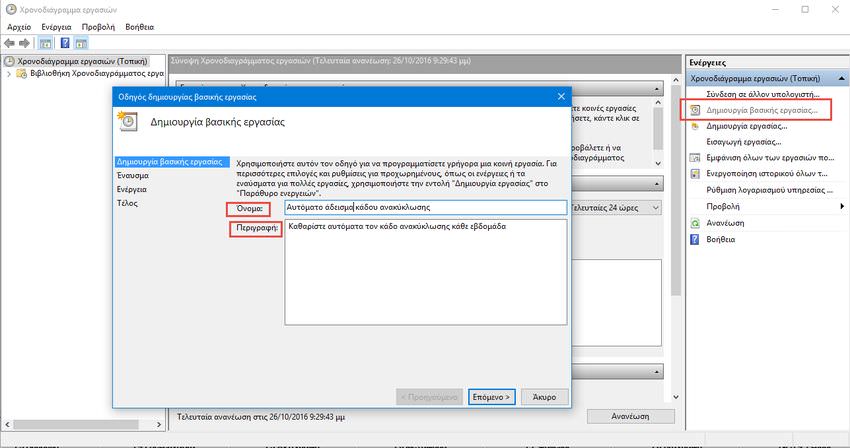
Step 2: After opening the task scheduler, click on the “Create Basic Task” option that appears in the right panel, under the “Actions” category.
Step 3: A new “Basic Task Creation Wizard” window will open. Here, enter the name and description of your choice, and then click the “Next” button to continue.
Step 4: In this window, you can set the time interval for when the task you want to do will take effect. Select the “Weekly” radio button and click the “Next” button.
Step 5: Now select the start time. Change the start time where it says “Start”. Leave the start date as today, unless you want the scheduled task to start counting from another date. Also, select which day of the week the recurring event will occur and then click the “Next” button.
Step 6: In the next window, select the “Start program” button and then click the “Next” button.
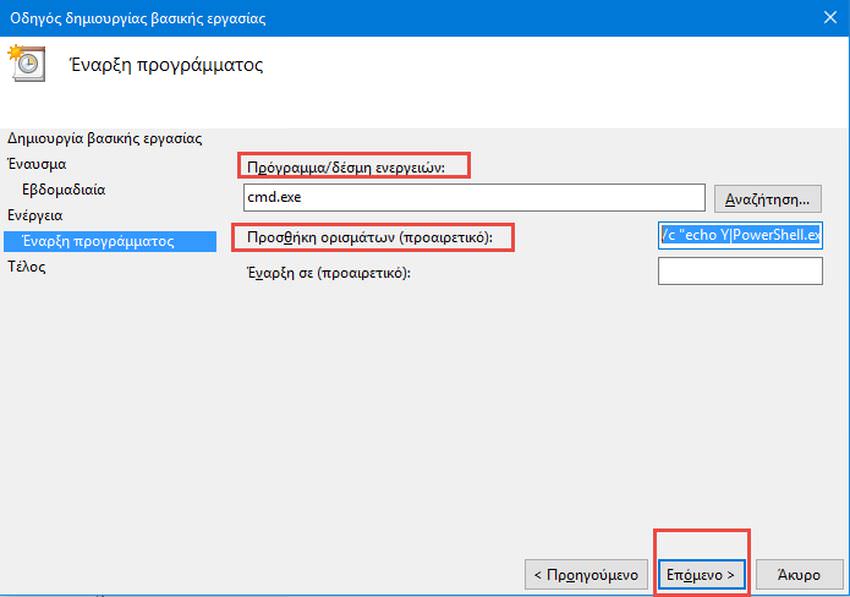
Step 7: In the “Program/Script” field, type cmd.exe and in the “Add Arguments” field, type the following phrase:
/c "echo Y|PowerShell.exe -NoProfile -Command Clear-RecycleBin"
and press the “Next” button.
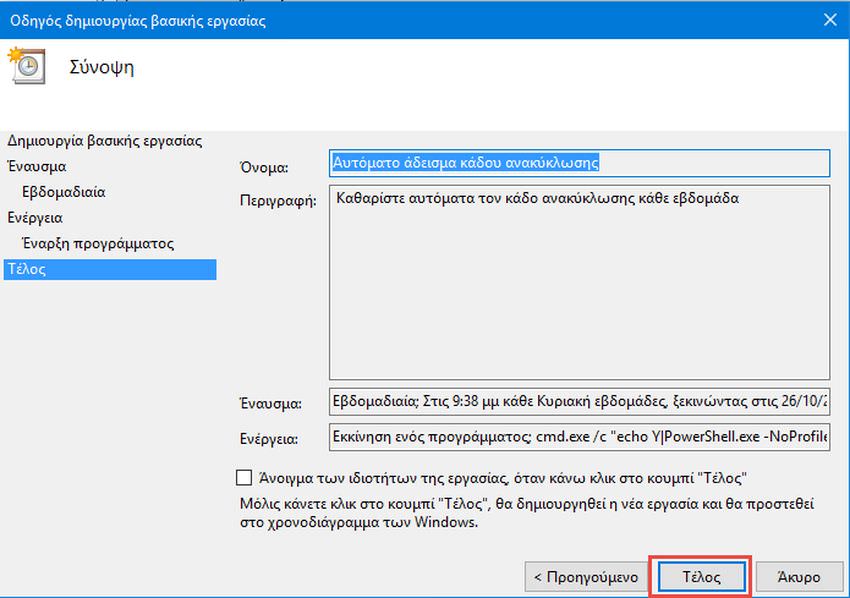
Step 8: In the next and final window, review all the settings you just configured and click the “Finish” button to complete the basic task creation process.
Step 8: After creating the project, select the task in the main window of Windows Task Scheduler and then click on the “Run” option that appears under the “Selected Item” category to check the scheduled task.
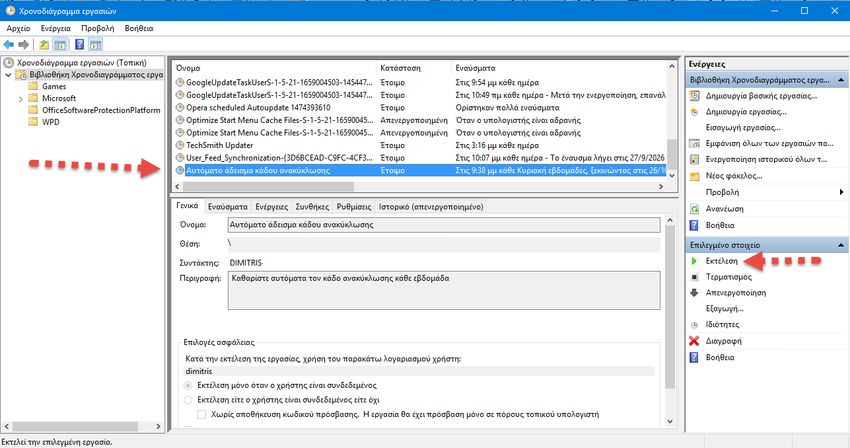
Once you click the option, if all goes well, you will see a quick Command Prompt pop-up with the progress of the task and the Recycle Bin will be cleared.
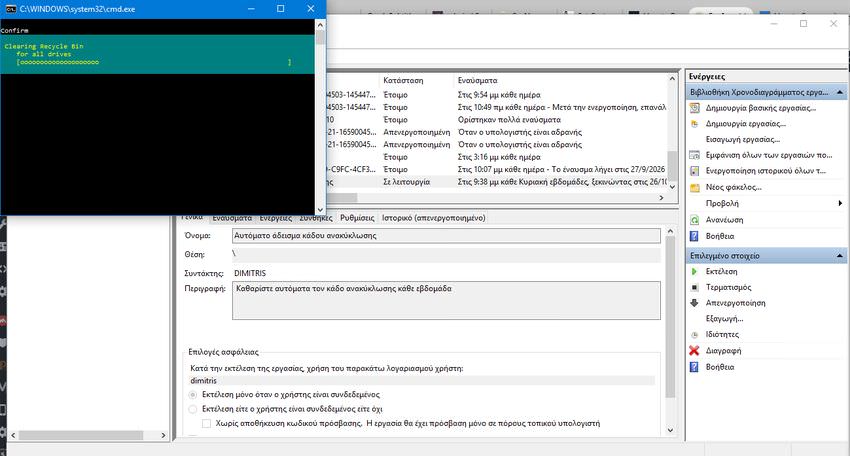
From now on, your recycle bin will be emptied automatically according to the schedule you have set in the Task Scheduler.
