

Windows 10 supports setting a time zone on your computer's clock. A time zone is essentially a region of the world that has the same time. Here's how you can allow or prevent Windows 10 users from making changes to this setting.

Each time zone includes all the countries that follow exactly the same time setting and, in addition to being addressed to countries where sunrise coincides with small deviations, it also contributes to the commercial and social activity of these countries among themselves, since they all follow the same time setting.
This may seem like a lot, since you might take it for granted that neighboring countries should have the same time, but it could be different. Imagine being 17 minutes behind the country to your right, 33 minutes behind the country to your left, and 5 minutes behind the country above you. The fact that each zone is exactly one hour behind serves some purposes.
Enough with the theory. Network and multi-system administrators can both configure the time zone in Windows 10 and change it. But they may not want the users of those computers to have the same rights. You can allow or prevent certain users or a group from changing the time zone on a Windows 10 device. See below how it can be done.
There is a special security policy that determines which users can adjust the time zone used by the device to display the local time, which includes the device's system time plus the time zone offset.
The following solution is for Windows 10 Pro, Enterprise, or Education editions, where you can use the Local Security Policy application to configure Windows policy.
How to allow users or groups to change time zones in Windows 10,
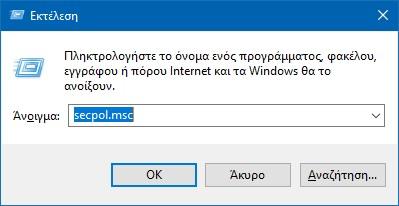
1. Press the Win + R keys simultaneously on your keyboard and type:
secpol.msc
Then press Enter.
2. Local Security Policy will open. Go to Local Policies -> User Rights Assignment.
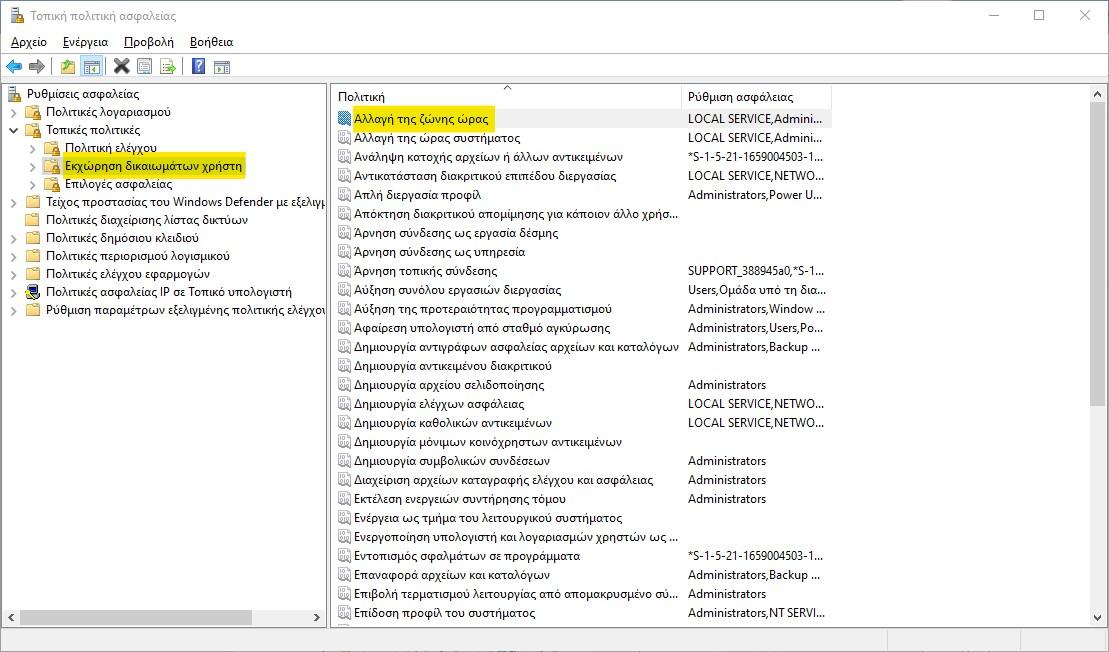
3. On the right, double-click Change time zone.
4. In the next dialog box, click Add user or group.
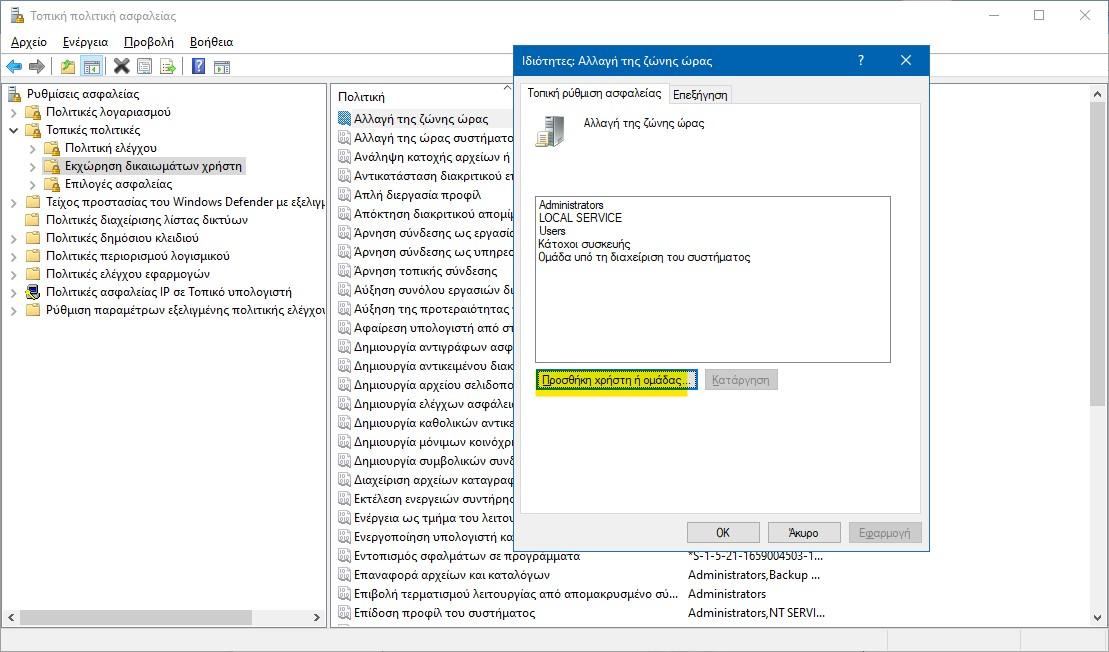
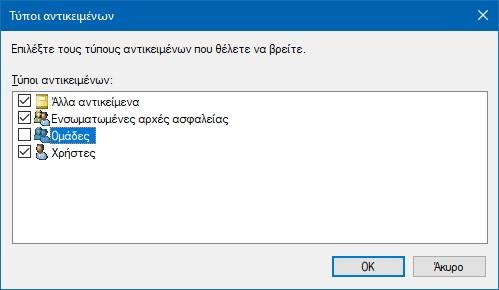
5. Click the Object Types button.
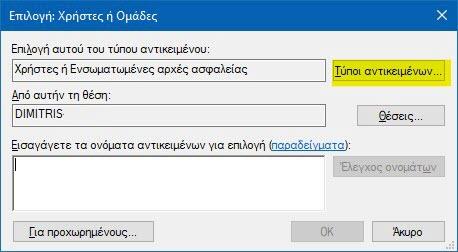
6. Make sure that you have selected the “Users” and “Groups” items and click the OK button.
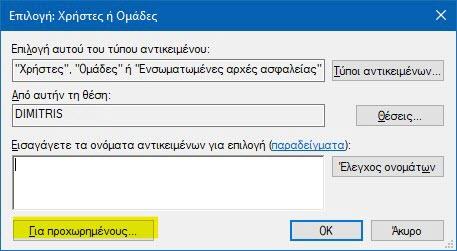
7. Click the “Advanced” button.
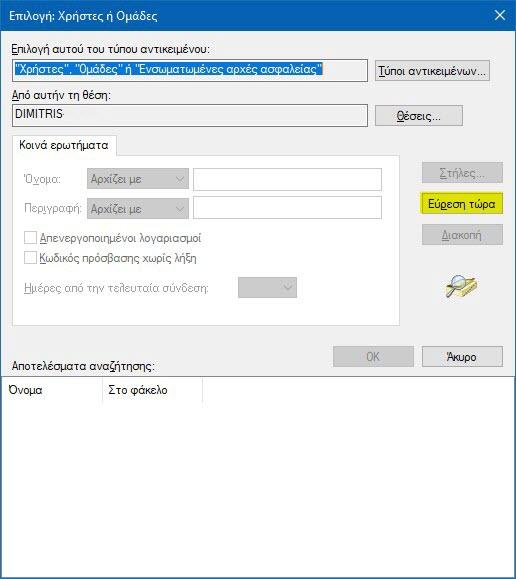
8. Click the “Find Now” button.
9. From the list, select the user account or group that will be able to change the time zone. You can select more than one entry at a time by holding down the Shift or Ctrl keys and clicking the items in the list.
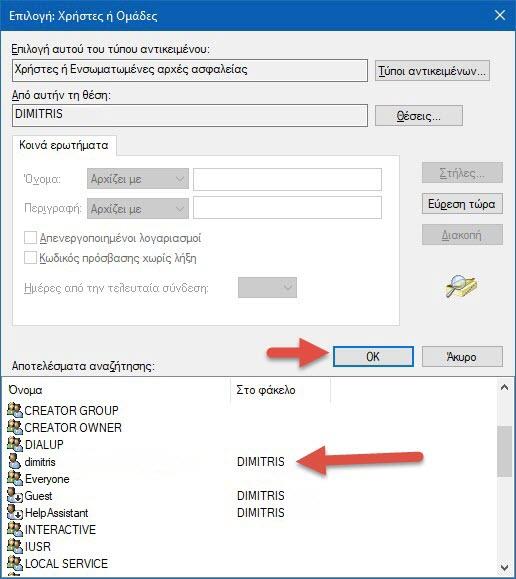
10. Click the OK button to add the selected items.
11. Click the Apply button and then the OK button to add the selected items to the rules list.
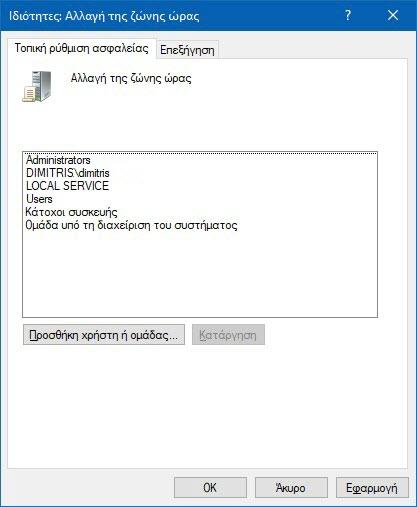
You are finished.
How to prevent users or groups from changing the time zone in Windows 10.
1. Press the Win + R keys simultaneously on your keyboard and type:
secpol.msc
Press Enter.
2. The Local Security Policy application will open. Go to Local Policies -> User Rights Assignment.
3. On the right, double-click Change time zone.
4. Select an entry and use the Remove button.
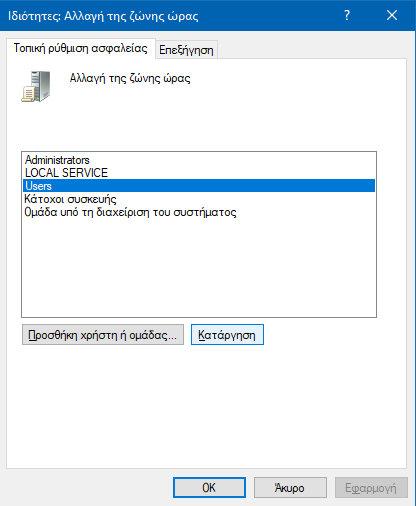
5. Press the Apply button and then the OK button.
You are finished
