

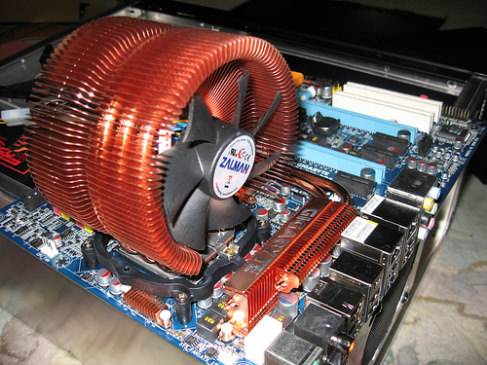
The System cooling policy is an option in the power supply that allows you to specify the cooling mode you want to use on your processor.
The system cooling policy options you are given are the following two:
- Active = Increase the processor fan speed first to cool it, and slow down the processor to cool it only as a last resort.
- Passive = First slow down the processor to cool down, and use increasing the fan speed for cooling only as a last resort.
Today we will show you how to configure the “System Cooling Policy” located under Processor Power Management in Power Options, for all users of Windows Vista , Windows 7 , and Windows 8.Additionally, you will learn how to hide or unhide this feature.
You will need to be logged in as an administrator to be able to follow the steps in this guide.
Setting the cooling policy >>>>> (instructions for Windows 8, do the same for other Windows)
1. Right-click the lower left corner of your screen and in the new window click the “Control Panel”
2. In the Control Panel click the “Power Options”
3. On the new screen click the “Change Plan Settings” that corresponds to the plan you are currently running and that is marked with a black dot 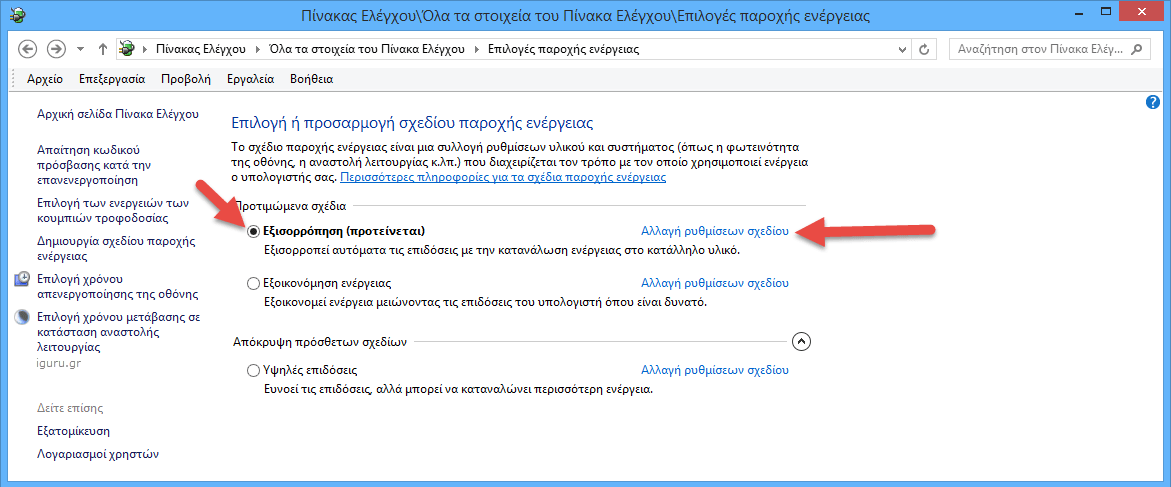
4. In the new screen click on “Change Advanced Power Settings” 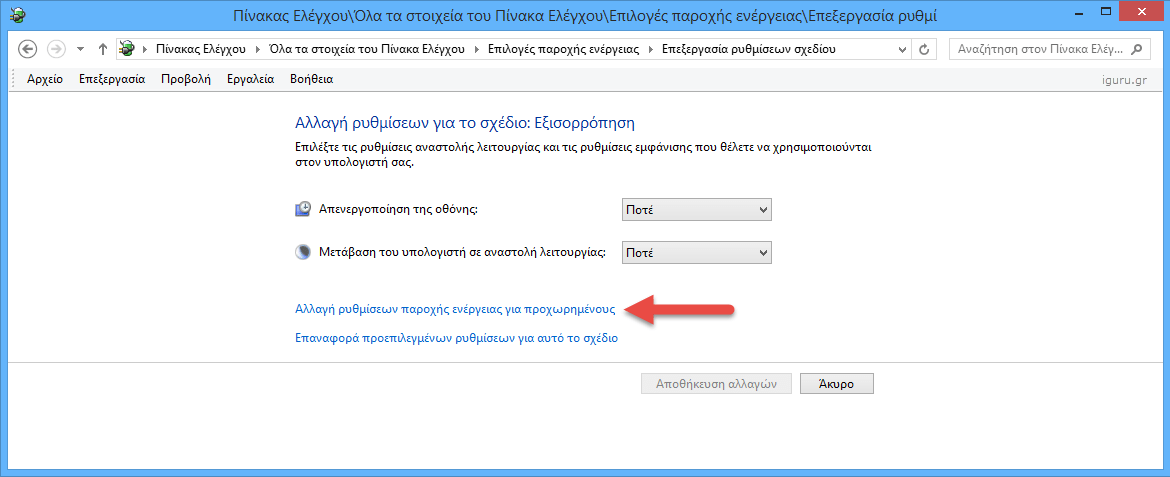
5. In the new window scroll down with the side bar until you find the “Processor power management” and click the [+] icon that is in front of the sentence to expand the options. The “System Cooling Policy” option will appear. Click the [+] icon above it to expand the sub‑options.
6. The Setting: Active option will appear . Click on “Active” to also see the “ Passive ” option and select the one you want.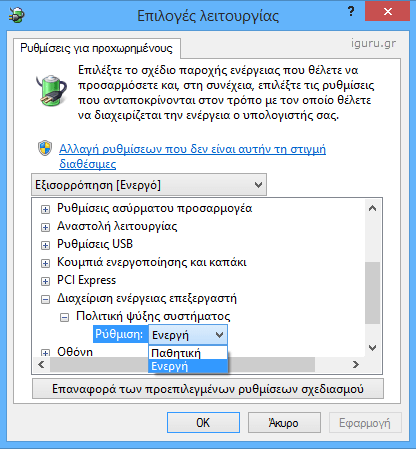
7. Select the mode you want and click OK. That's it. You have made the setting you want.
Hide – unhide the cooling policy ——————->>>>> (instructions for all Windows)
1. Press the Win + R keys to bring up the “Run” window. There type the word regedit and press the OK button.
2. The Registry window will open. Find the following location:
HKEY_LOCAL_MACHINE \ SYSTEM \ CurrentControlSet \ Control \ Power \ PowerSettings \ 54533251-82be-4824-96c1-47b60b740d00 \ 94D3A615-A899-4AC5-AE2B-E4D8F634367F
3. Right-click on the left side of the window and select Create > DWORD Value (32 bit) 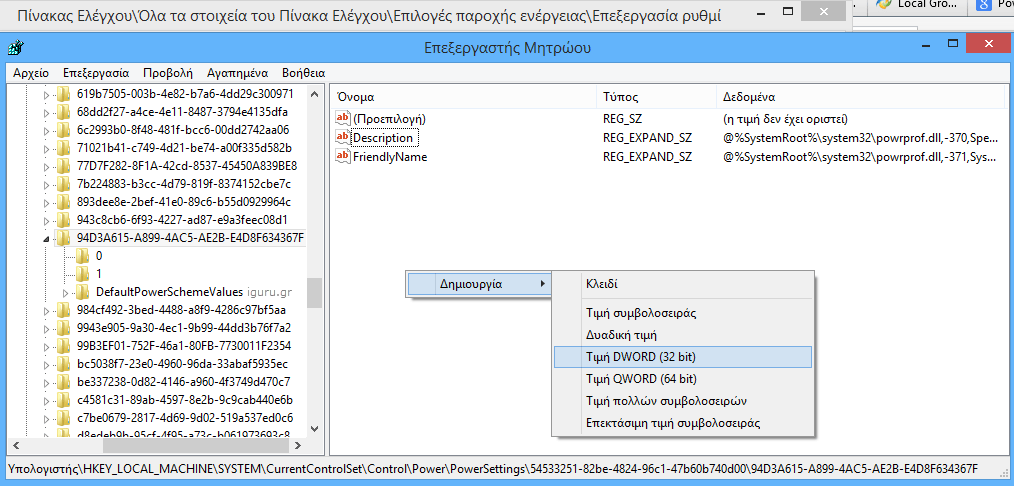
4. Name the new parameter “Attributes” and then by double left-clicking on it give it the value you want. Only the values 1 or 2 are accepted and they mean: 1= Remove and 2= Show. 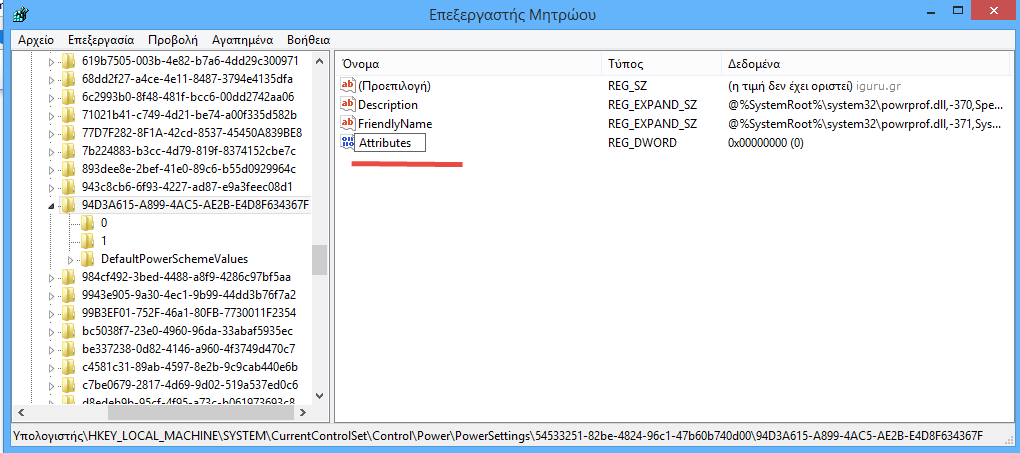
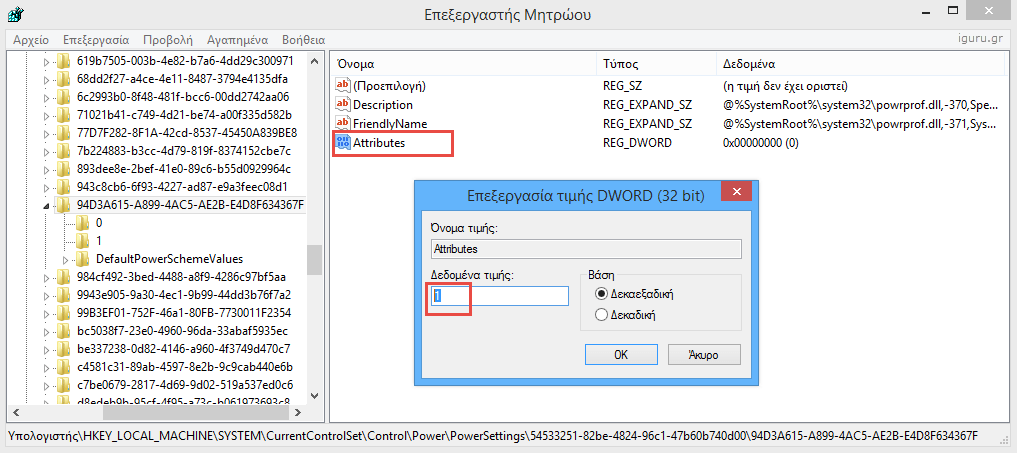
5. If we select the value 1 [Remove] and simply close the regedit window (the data is saved with a simple click of the X in the top right corner of the window) and then we go to set the “Processor power management” > “system cooling policy” we will see that now it no longer appears as an option. If we set the Attributes to value 2 or simply delete the Attributes from the registry we will see that it will reappear. 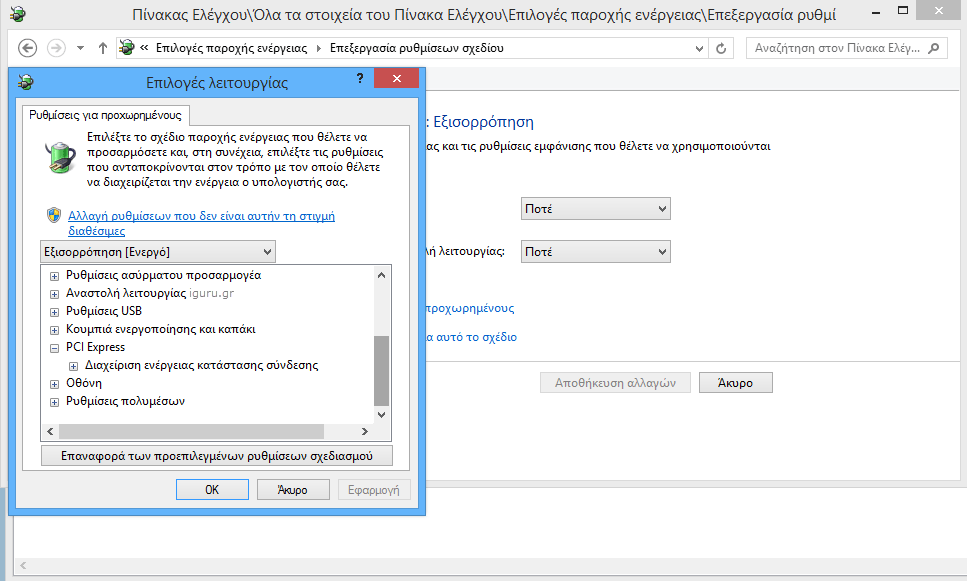
Good luck
