

FreeBSD is a Unix-compatible free and open source operating system, which has its roots in Research Unix through the Berkeley Software Distribution (BSD).
FreeBSD is a descendant of BSD, which was called “BSD Unix” or “Berkeley Unix” (in violation of the UNIX trademark).
The first version of FreeBSD was released in 1993, and as of 2005 it is the most widely used BSD distribution, being installed on more than three-quarters of all systems running BSD distributions.
FreeBSD has similarities to Linux, with two important differences:
First, FreeBSD is a complete operating system, meaning it provides the kernel, device drivers, user utilities, and documentation, unlike Linux which only provides the kernel and drivers, while the system software is developed by third parties.
Second, the FreeBSD source code is distributed under the permissive BSD license, as opposed to the copyleft GPL license used by Linux.
Below we will see how you can install FreeBSD on your computer, as well as how you can add it to the boot menu of the Linux distribution you are using.
In my case, although I mainly use Arch and Debian for my daily activities, the boot menu I use is from Manjaro Linux. Yes, I have installed Manjaro on a small partition of the disk just because the boot menu of the distribution allows entry from the last operating system you used.
Example: My computer has the Arch, Debian, Gentoo, MX distributions, and an installation of Windows 10 (so they don't call me stuck with Linux).
In case I am using Debian and reboot, I will not need to re-select the distribution I was using from the boot menu, since Manjaro will boot into the system I was on (Debian).
Installing FreeBSD.
The installation media can be used in three ways: to install FreeBSD, as a "live CD" or simply to access a FreeBSD shell. Use the arrow keys to make a selection and Enter to confirm. After booting from the installation DVD or USB you will see the following image:
(*) live CD is not what you think, FreeBSD does not have a graphical interface.
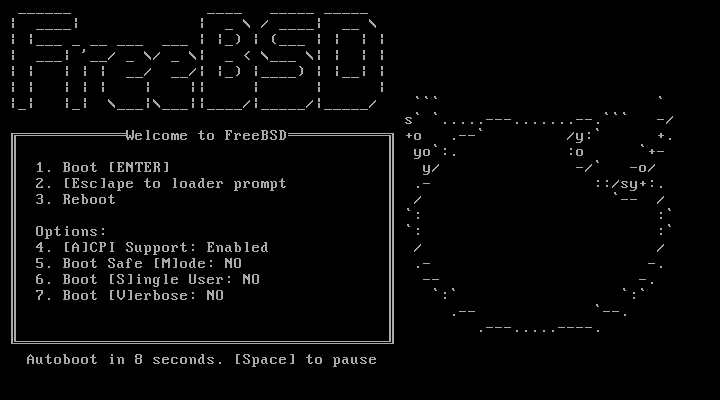
On the first screen, press Enter and on the next one (below), select Install
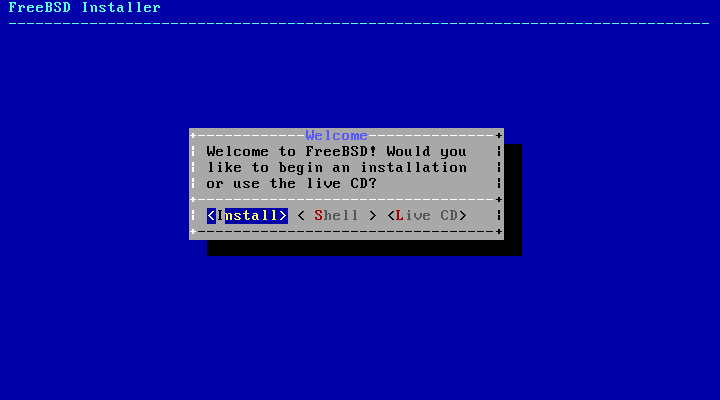
bsdinstall is a text-based installation application for FreeBSD. It was written by Nathan Whitehorn and first used in 2011 in FreeBSD 9.0.
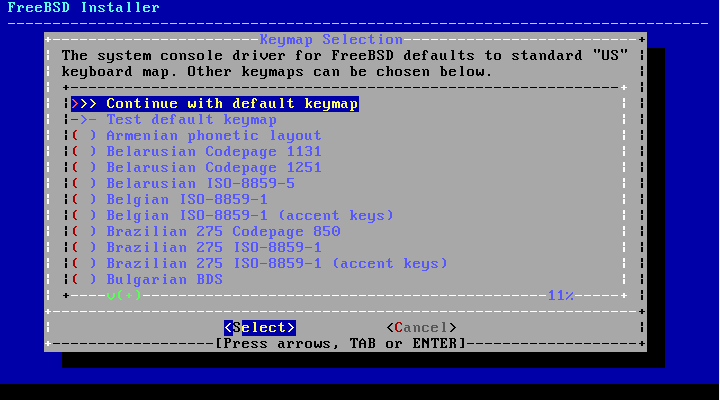
The next screen will ask you to select the type of keyboard you are using. Select
“Continue with default keymap”
To configure your network (IPv4, IPv6) select via DHCP and proceed as normal. The installer will automatically find any wired connections. 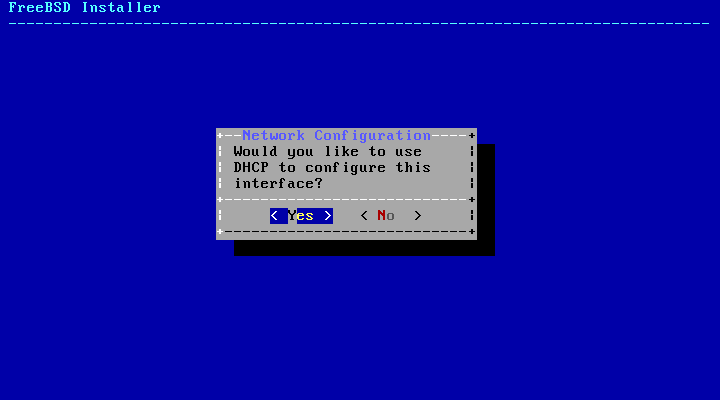
Select hostname
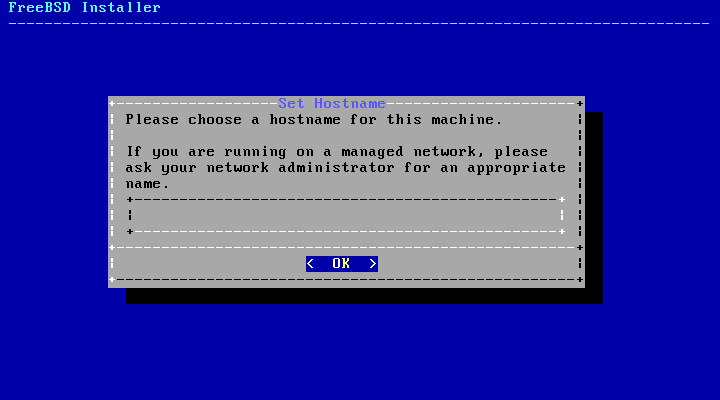
On my system I chose iguru as the hostname.
FreeBSD Select add-ons
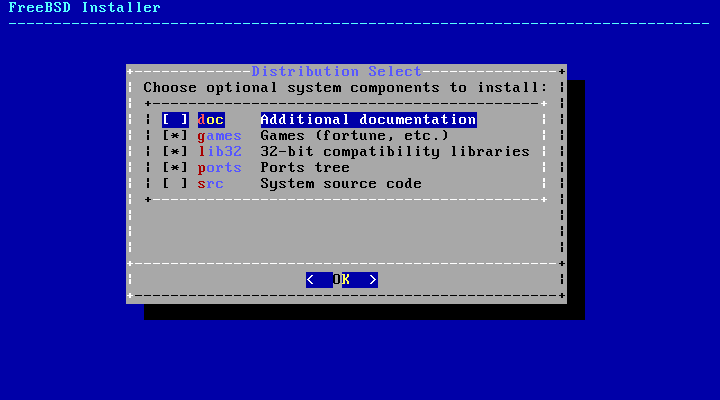
The choice of installation components depends mainly on the use of the system and the available free disk space. The kernel and the basic programs of FreeBSD (also known as the "base system") are mandatory to install. Personally, I did not choose the games and ports (you can add whatever you need later).
- doc – Additional documentation, mostly of historical importance. Documentation provided by the FreeBSD Documentation Team is installed separately at a later stage.
- games – Some traditional BSD games including fortune, rot13 and others.
- lib32 – Compatibility libraries for running 32-bit applications on 64-bit versions of FreeBSD.
- ports – The FreeBSD Ports Collection.
src– The System Source Code.
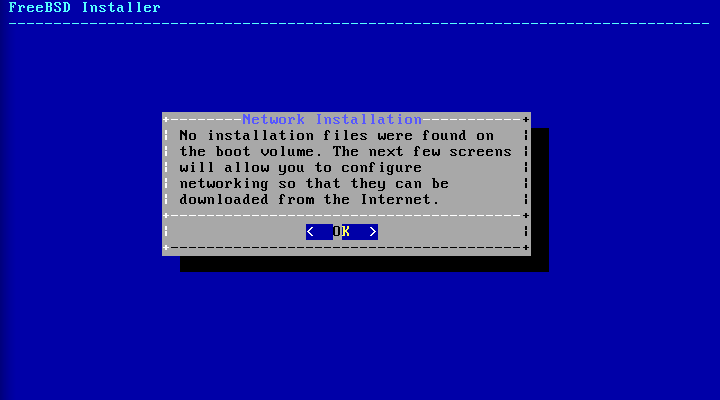
FreeBSD Network Installation.
The bootonly installation media does not have copies of the installation files. When you use the bootonly method, the files are downloaded from the Internet on demand.
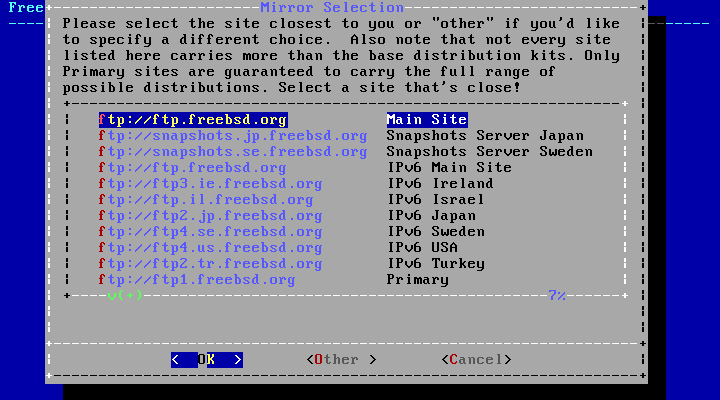
Select mirror. Scroll down with the arrows until you find the URL for your country, for faster download.
Disk formatting:
There are three ways to create disk space for FreeBSD. The Guided method creates partitions automatically, the Manual method allows advanced users to create custom partitions, and the option to launch a shell to create partitions directly using command-line tools such as gpart, fdisk, or bsdlabel.
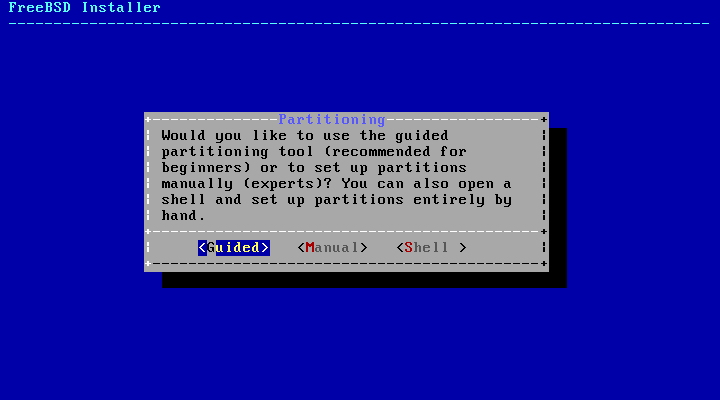
Select Guided and click Enter.
You can install the operating system on either the entire disk or a part of it. If you select [Entire Disk], the appropriate partitions will be created to use the entire disk. If you have other operating systems installed on your disk, select [Partition].
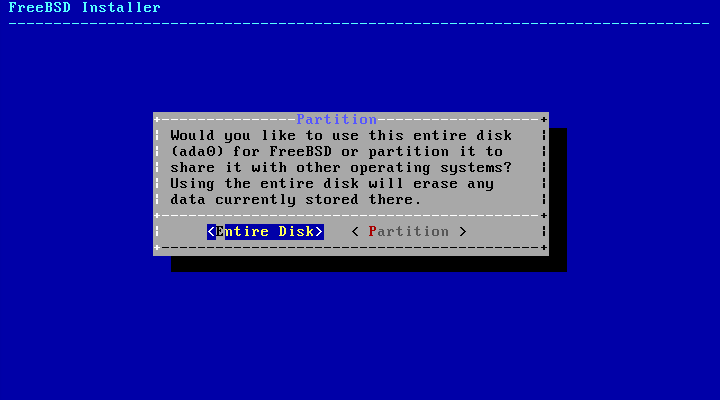
In the second case (if you proceed with the [Partition] option), you will need to select the disk you wish to install on. 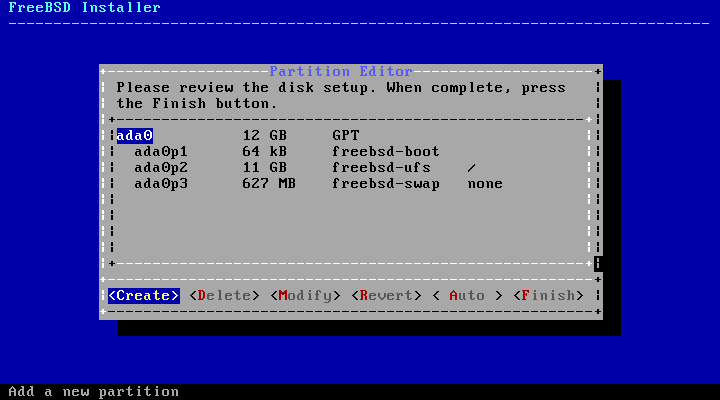 Select the partition you wish to install the operating system on, and use the arrow keys to select Auto before pressing Enter.
The installer will ask you if you allow it to create the boot partition, click Yes, then Finish and Enter again.
In my case, I installed FreeBSD on partition 10.

Final Confirmation
Select and press Enter to continue. If you need to make changes, select to return to the disk editor. You can use the to exit the installer without making any changes to your hard drive.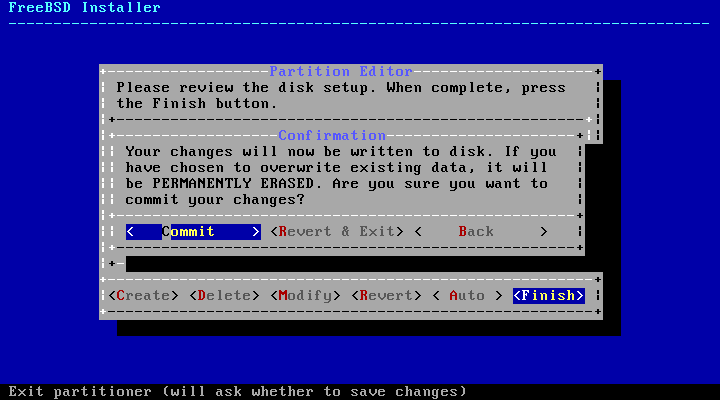
The installation time will vary depending on the distributions and installation components you have selected, the installation media, and the speed of your computer. You will see a series of messages about the progress of the process.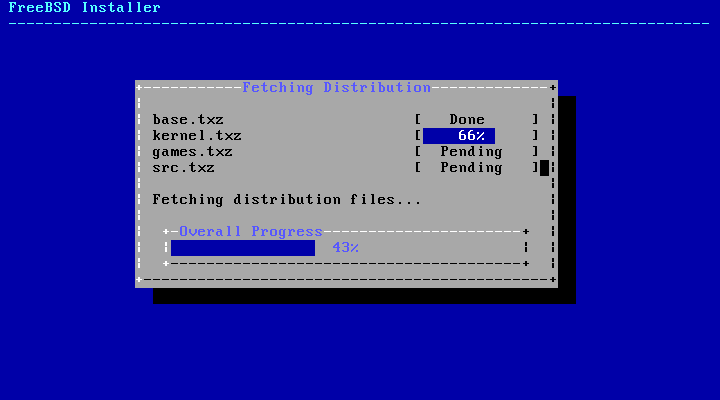
First, the installer will write the partitions to the disk and run appropriate newfs commands to create the corresponding file systems.
If you are installing over a network, bsdinstall will proceed by downloading the necessary files.
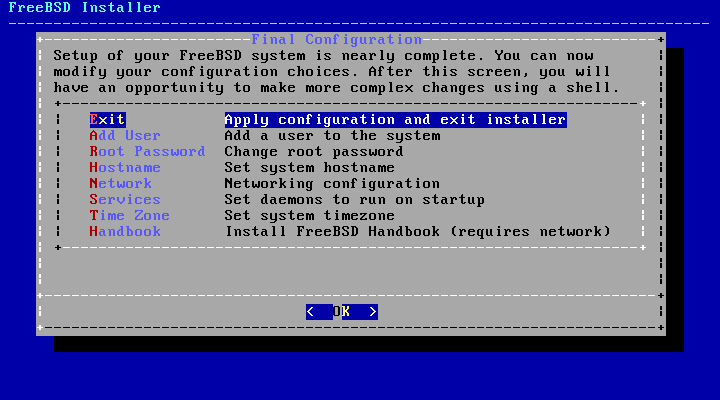
After installing FreeBSD, there are a number of settings to make. You can redo any setting by entering the corresponding option in the final menu before rebooting into your newly installed FreeBSD system.
Setting the root password
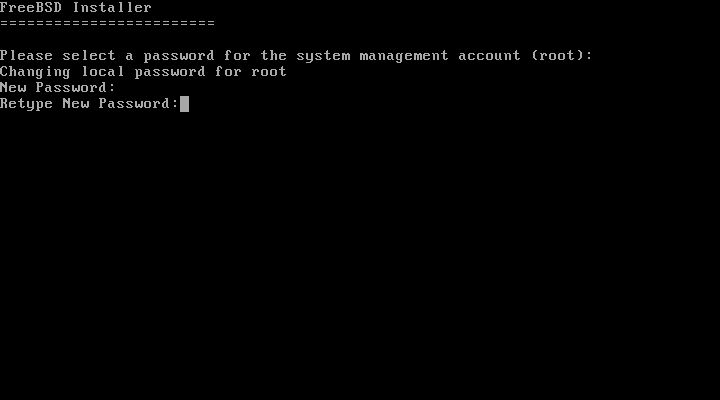
If you want to create a new user Enter User Information:
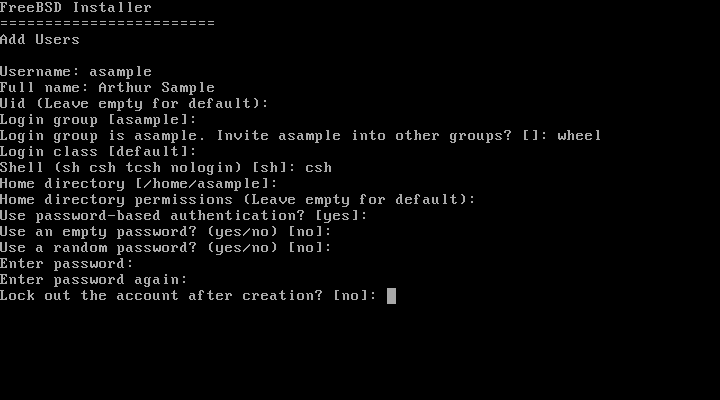
FreeBSD User Information
- Username – The name the user will use to log in to the system. Typically the first letter of the first name combined with the last name.
- Full name – The user's full name.
- Uid – User ID. The user identification number. We usually do not fill in this field, so that a number is automatically selected by the system.
- Login group – The group the user belongs to. We usually leave this blank to accept the default value or select wheel.
- Invite user into other groups? – Additional user groups to which we want the user to belong.
- Login class – We usually do not fill in this field, so the default value is accepted.
- Shell – The shell that this user will use. In our example we chose csh(1).
- Home directory – The user's home directory. The default value is usually correct.
- Home directory permissions – The permissions on the user's home directory. The defaults are usually correct.
- Use password-based authentication? – The typical answer is “yes”.
- Use an empty password? – The standard answer is “no”.
- Use a random password? – The standard answer is “no”.
- Enter password – The password for this user. It is not shown on the screen as you type it.
- Enter password again – The password must be entered again for confirmation.
- Lock out the account after creation? – The typical answer is “no”.
After entering all the information, you will see a summary of it and the system will ask you if it is correct. If you made a mistake during the entry, type no and try again. If everything is correct, type yes to create the new user.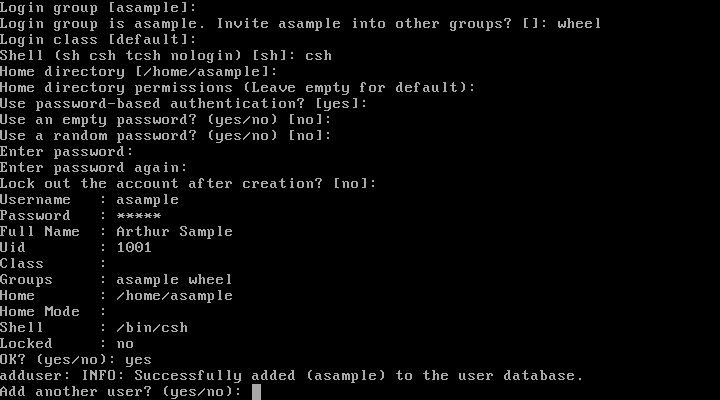
FreeBSD Add to the Boot Menu of the main distribution you are using.
In my case, I made the following addition to Manjaro's /etc/grub.d/40_custom with the command nano /etc/grub.d/40_custom (as root).
Change the number to gpt10 and add the number of your own partition
menuentry "FreeBSD" { insmod ufs2 set root=(hd0,gpt10) chainloader /boot/loader.efi }After adding, run the following command to add FreeBSD to your computer's boot menu.
grub-mkconfig -o /boot/grub/grub.cfg
With the above steps you will have a basic installation of FreeBSD, without a graphical interface. We will see how to install one in a later post.
FreeBSD 12 installation KDE Plasma
Source
handbook/bsdinstall-post.html
Download image
_______________
- Septor Linux 2019.2 anonymous internet for everyone
- Firefox Monitor activation in versions 65-66
- Whonix 14.0.1.4.4 the completely anonymous operating system
