

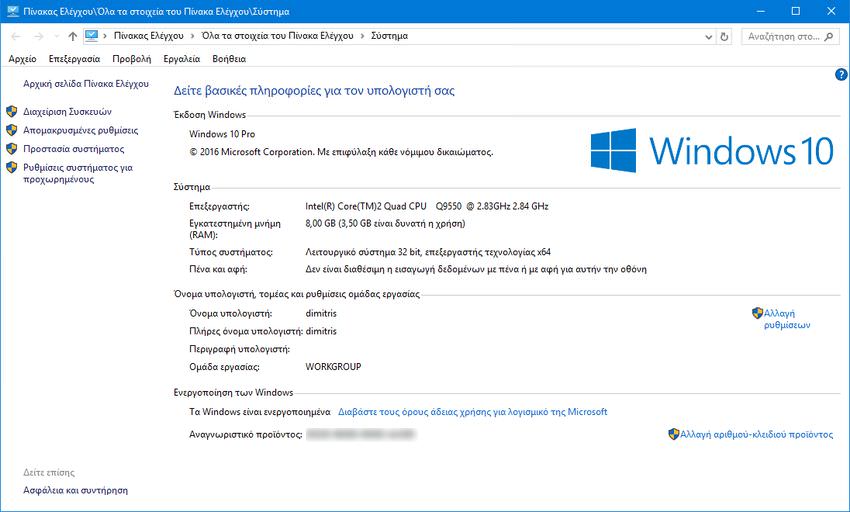
If you purchased your Windows computer from a well-known manufacturer, you may see some information about it in the “System” tab. You can, if you want, change all of this data and declare yourself as the manufacturer of your computer, even providing additional information about yourself.
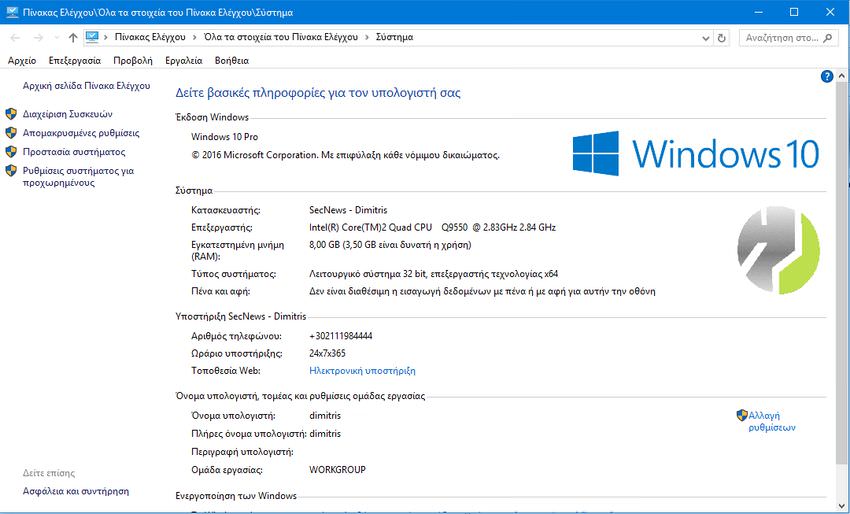
The “System” window in Windows has a lot of useful information about your computer, such as your processor model, the amount of RAM installed, which version of Windows you are running, etc. If you are using a pre-owned computer, this window shows additional manufacturer information, such as the manufacturer’s name, support phone number, website, support hours, and even a logo.
You can customize this information by modifying it or adding your own information. It's like being the manufacturer of your system. Or if you want, it's like signing your machine (which could prove to be a useful identifier in case of theft). All you have to do is tinker with the Windows registry. Let's see how.
First of all, to see the current status in the “System” tab, all you have to do is click on the Windows start button (or press the Win + X keys) and from there click on the “System” option.
1. Let's go change or add them now. Open the Registry Editor. If you don't know how, then press the Win + R keys simultaneously and type the word “regedit” in the run window that will appear. Press the OK button to open the Registry Editor and say “Yes” if Windows asks you for permission to let the registry editor make changes to your computer.

2. In Registry Editor, use the left sidebar to navigate to the following key:
HKEY_LOCAL_MACHINE\SOFTWARE\Microsoft\Windows\CurrentVersion\OEMInformation
3. If your computer already has the manufacturer information, you will see several string values inside the OEMInformation key. If your computer does not have any related values, you will need to add them. You can add the following values:
- Manufacturer
- SupportHours
- SupportPhone
- SupportURL
- Logo
You don't have to add all the values. You can add only the ones you want to display.
4. To add a value, right-click in the right pane on the OEMInformation key and select “Create” and then “String Value.” Name the new value using one of the names from the list above, writing it exactly as you see it and without spaces.
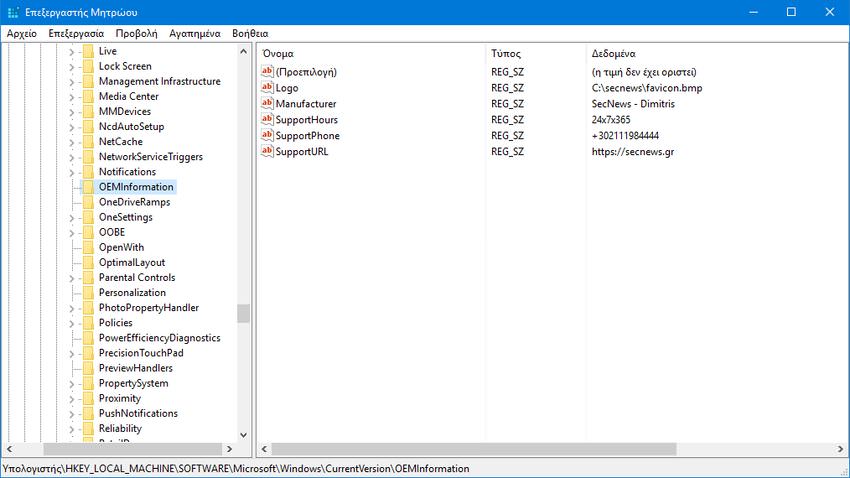
5. If the values already exist, then simply double-click on each value you want to change to enter its properties tab and type your own data in the “Value Data” field and then click the “OK” button. You can either replace the information, add new ones of your own, or remove the ones you don’t want to see. If your manufacturer’s information already existed, then note it down somewhere before making any changes, so you can restore it if you ever want to.
As for the logo, to add it, type the full path of the image you want to use. For example:
C:\Secnews\favicon.bmp
For best results, use a small logo image, approximately 100 × 100 pixels, and make sure it is in .bmp format, since .png and .jpg are not “readable”.
6. Once you have added the information you want, you can simply close the Registry Editor. The changes will be automatically saved and will take effect immediately, so you don’t need to restart your computer. All the information you have entered should now appear in the “System” window.
If you ever want to undo the changes, simply go back to the OEMInformation key and delete all the values except the Default value. If you want to restore the information that was previously there, you will need to change each value and put the old one back.
