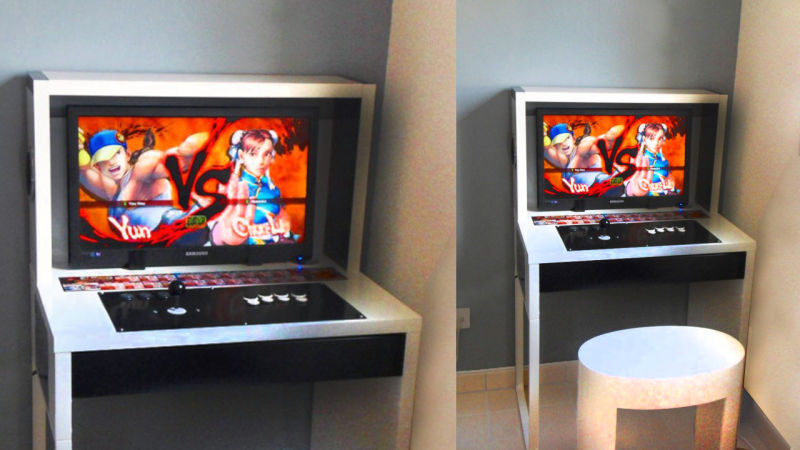
A DIY Arcade Cabinet Made from IKEA Parts
Check out the DIY arcade cabinet from IKEA components. In this article, we'll show you how to build an awesome arcade cabinet mostly from IKEA components that are easy to buy, easy to modify, and designed to fit just about any game, old or new. An actual arcade cabinet, console, and cables are hidden inside the cabinet drawer.
According to SIN Tchan, an IKEA Hackers reader in Paris who built this system himself, he tells us what is required if you are interested in creating it:
– Micke Desk $49.99
– Samsung 24” HDMI monitor with speakers $150
– Arcade motherboard on a stick $30 (type “PCB arcade stick” on amazon.com)
– Buttons + joystick (Sanwa brand) $40
– Stainless steel table $30
– Black stickers $15
– Stool $50
– An xbox or PlayStation system
As we saw above, SIN Tchan has been left out of the price collapse for the console, which is also very important. So, if you have an old console that you are not using and is just gathering dust, it could be put to great use, giving it more life. Once you are ready and have gathered all the above items, simply follow the steps below:
- Drill holes in the stainless steel panel for the buttons and Joystick.
- Open 2 rectangles on the desktop, so you can place the Joystick and buttons.
- Place the black sticker on the stainless steel panel. Use a lighter directly on the sticker to eliminate air bubbles if necessary.
- Connect each button and the Joystick to the PCB (it's very easy – hint on YouTube).
- Screw the stainless steel panel to the top of the work surface.
- Screw the two monitor supports to the metal on the desktop (6 cm from the back of the desk).
- Install your console inside the IKEA drawer (for better airflow, you can also drill some holes in the back/side of the drawer).