

When you take screenshots on a Mac, the Mac screenshot tool usually hides the mouse cursor so it's not visible. But sometimes, you need to drag the pointer as well to point at something properly. Luckily, it's easy to enable it with a simple option. Here's how.
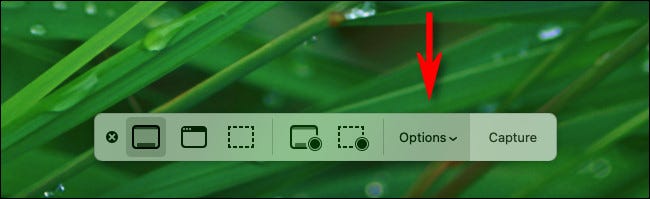
To capture the mouse cursor in screenshots, we need to change an option in macOS. Press Shift+Command+5 on your keyboard and a small toolbar will appear. Click “Options.”
In the “Options” menu that appears, place a check mark next to “Show Mouse Pointer”.
See also: How to find the Photos library on your Mac?
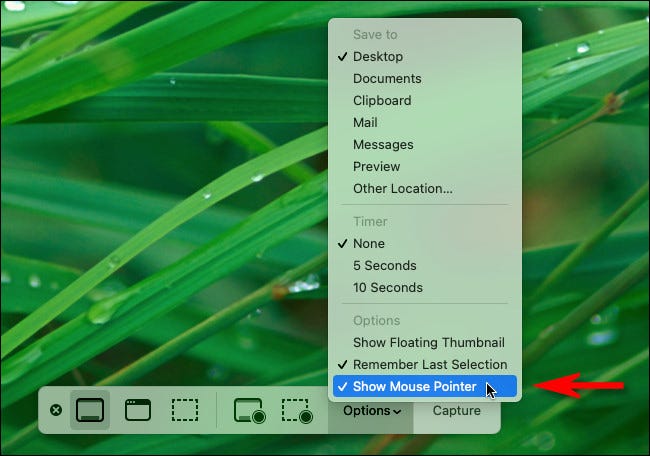
After that, every time you take a screenshot with Shift+Command+3 or Shift+Command+4, you will also drag the mouse pointer into the screenshot.
See also: How to restore default fonts on Mac
If you want to hide the mouse cursor in the future, simply enable the Screenshot toolbar with Shift+Command+5 again and uncheck “Options” > “Show Mouse Pointer”.
See also: Do you know the condition of your Mac's SSD?
macOS does not record the exact size of a pointer that has been enlarged using Mac accessibility features. This suggests that the pointer image is added to the screenshot by the screenshot program rather than simply capturing a raw bitmap of the screen. If this is a problem, you can try a third-party screenshot application.
Information source: howtogeek.com
