

If you installed Windows 10 version 1809 “October 2018 Update” you may have noticed that your free disk space has decreased significantly. You can gain up to 20 Gigabytes by simply deleting old installation files.

With the installation of each new major version of Windows 10, your operating system saves many files from its previously installed system during the upgrade and fills your hard drive with data that you will not need again if your upgrade is successful.
The reason for saving these files is so that if something goes wrong during the installation, the operating system can safely revert to the previous version of Windows. However, if your upgrade was successful and everything is working perfectly, then you don't need to keep these files. You can reclaim all that space by following these simple instructions.
Before you continue: Please note that deleting these files will remove the ability to uninstall Windows 10 October 2018 Update. You will not be able to restore your previous version of Windows.
Step 1: Open Settings.
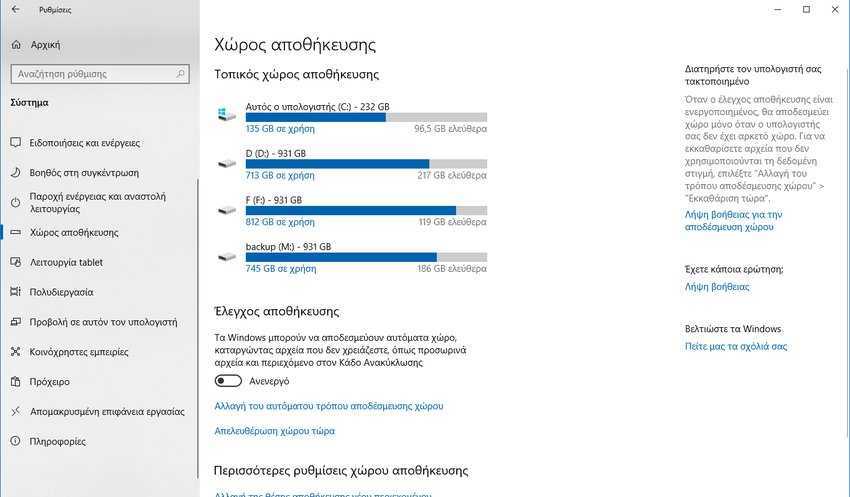
Step 2: Go to System > Storage.
Step 3: Click the “Change how I free up space automatically” link under the Storage Control option.
Step 4: On the next page, find and check “delete previous versions of Windows”.
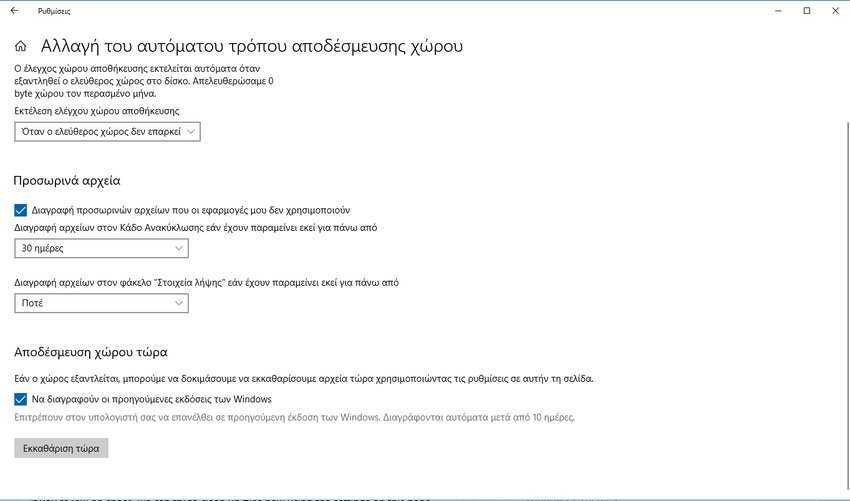
Step 5: Click the “Clear Now” button
That's it! Your command will remove all the files you selected in the list.
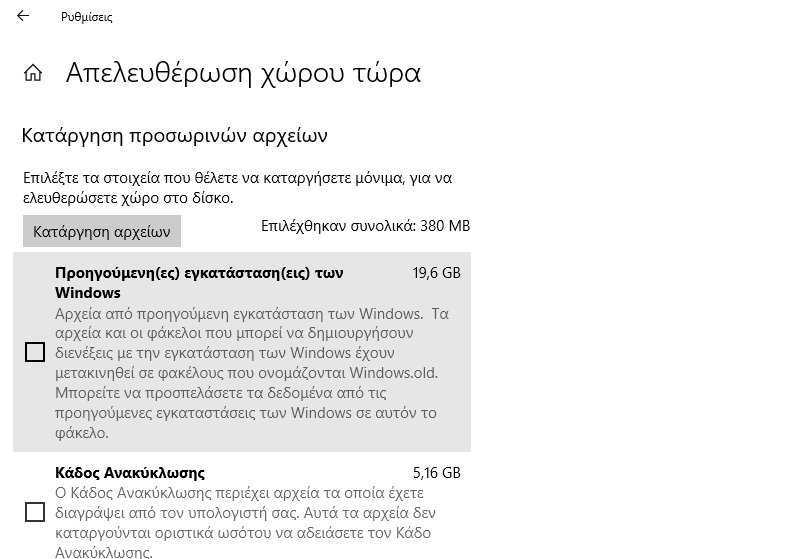
2nd alternative is to go to Settings > System > Storage and press the “Free up space now” command.
A list of options for various types of temporary files will appear. Highlight “Previous Windows installation(s)” and click the “Remove files” button
3rd alternative is to use the classic disk cleanup tool, Disk Cleanup. Disk Cleanup is a basic Windows system tool that allows you to delete various useless files created by the operating system to save space on your disk. Although Microsoft is retiring the classic “Disk Cleanup” application, it is possible to use it in Windows 10 version 1809. Here’s how:
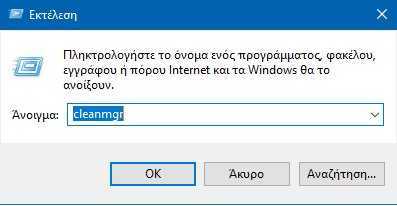
Step 1: Press the Win + R shortcut keys on your keyboard to open the Run dialog box.
Step 2: In the Run dialog box, type cleanmgr and press the OK button. Windows 10 will run cleanmgr.
Step 3: Select the system drive where Windows is installed. Usually it is C: and press the OK button.
Step 4: Click the “Clean up system files” button to go to the extended mode of the Disk Cleanup tool.
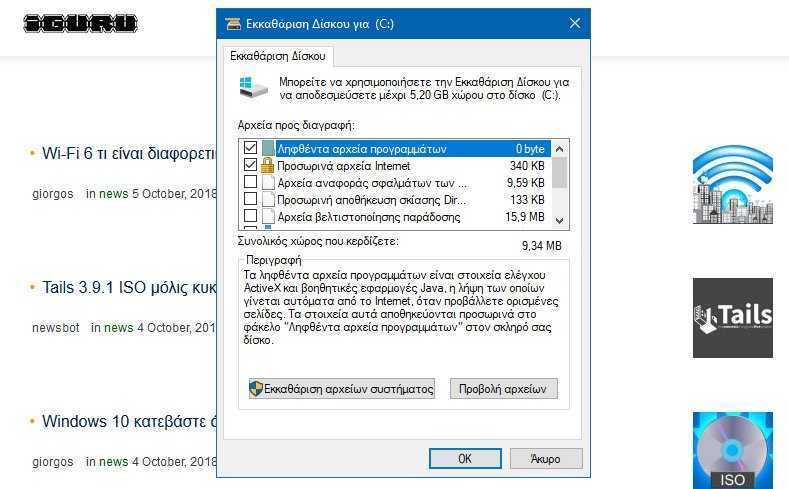
Step 5: Find and select the “Previous installation(s)” item.
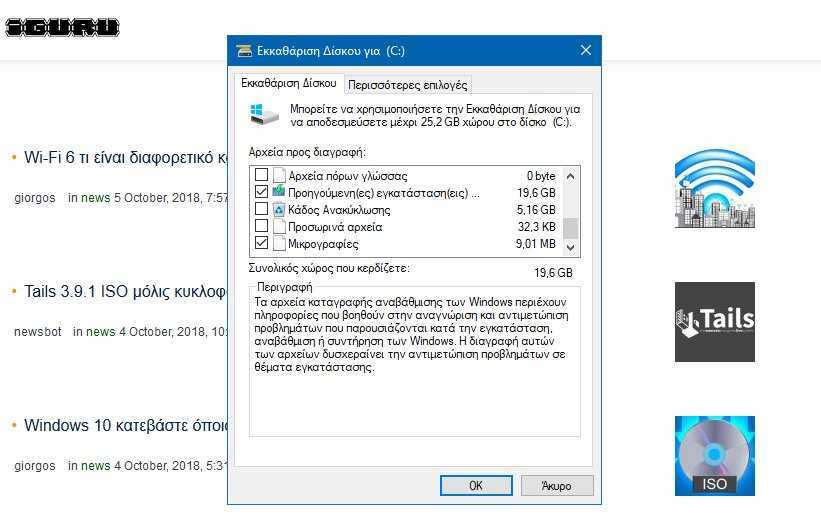
Step 6: Click the OK button and you're done.
In our example, we gained 19.6 GB of free disk space. It may not be significant for those who have many large-capacity disks, but there are machines that have only one disk (laptop, tablet) which, if it is full of other files and tasks, 20 GB is valuable.
