 Now that you've downloaded the April Update to your computer, it's time to explore the features this latest update offers. One of its hottest features is Timeline, which was expected to arrive alongside a feature called Sets. Apparently, Microsoft saved the latter for Redstone 5.
What is Windows 10 Timeline?
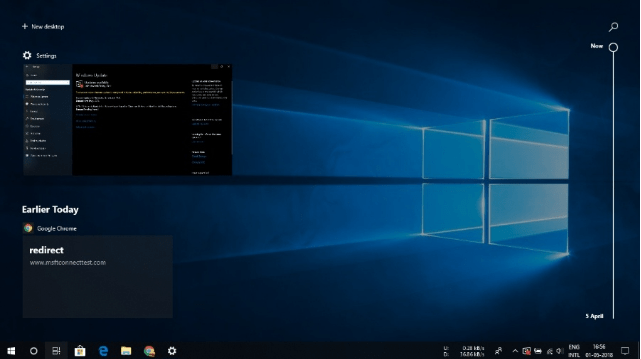
Timeline, which has been the talk of the town since it was introduced in Insider builds, is a boon for people who use different devices on a daily basis. You can find it in Task View. It can be used to manage current tasks on desktops as well as to keep up with tasks on connected phones.
The average user might have a computer, a smartphone, and maybe an iPad or other tablet. Keeping your work in sync across all of these devices is a pain in the ass, even with an incredibly fast internet and a plethora of cloud services. Windows 10 Timeline automates the syncing part and improves the multi-device experience.
How to use Windows 10 Timeline?
Timeline is included with the virtual desktop feature. To use it, click the Task View on the taskbar, and activities from various apps and devices will be displayed in reverse chronological order.
You can also open Timeline using the Windows + Tab or by scrolling upward with three fingers on a touchpad.
The thumbnails that appear in Timeline are called Activities. You can click on any of them to continue what you were doing. For example, if you watched a video on YouTube two days ago, an Activity can take you back to the website. Similarly, it offers an easy way to get back to documents and emails that you often forget to look at. You can start writing an article in MS Word on your computer and use your tablet to proofread the text at the same time.
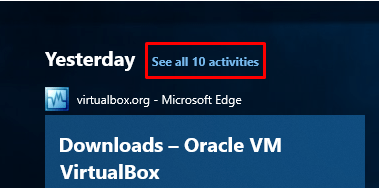
Timeline in Windows 10 can display activities for up to 30 days. As you scroll down, you can see activities from previous dates. Activities are grouped by day and by hour, if a day has too many of them. To access activities grouped by hour, click See all , next to a date. To return to the main interface, click See only top activities.
How to delete an activity on Timeline?
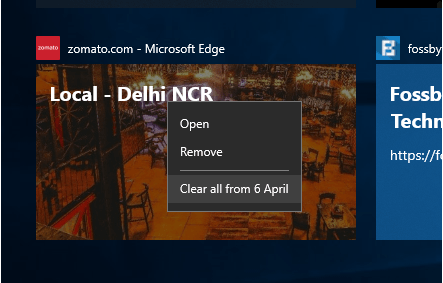
You can easily remove an activity in Timeline. Simply right-click the activity you want to delete and click Remove.
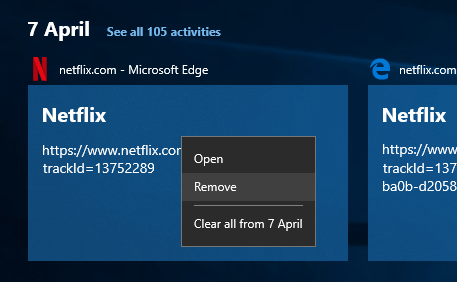
Similarly, you can remove all activities from a specific day by clicking Clear all from. .
Search for activities
In the top right corner of the interface, there is a search option that allows you to quickly find the activities you are interested in. For example, if you type the name of an application, all activities related to that application will be displayed.
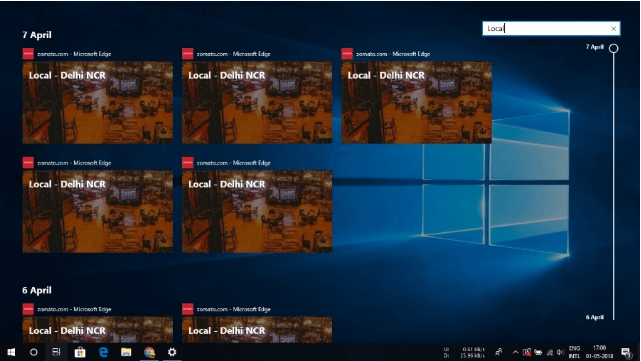
If you were watching Netflix or searching for a restaurant a few days ago, type the name or website directly into the search bar. This way, you can search for apps, documents, web pages, images, videos, and more.
More settings about Timeline
Stop suggestions
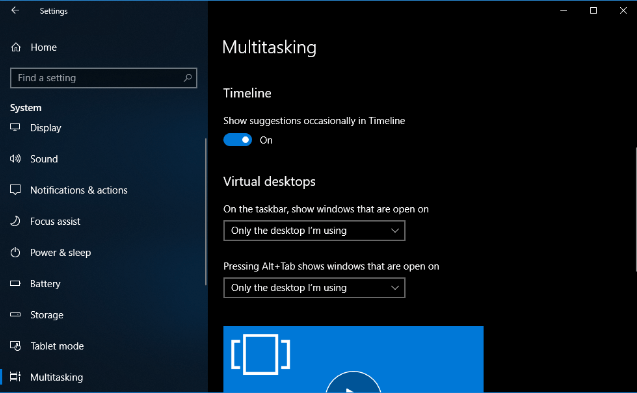
If you want to stop activities from appearing in Timeline, go to Settings > System > Multitasking. Turn off the “Show suggestions occasionally in Timeline”.
Disable Windows 10 Timeline
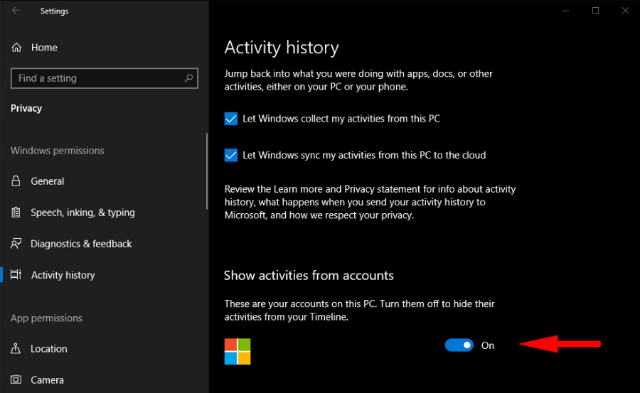
It goes without saying that Timeline is powered by the Microsoft cloud to place activities across devices. You can turn off cloud syncing if you want. Go to Settings > Privacy > Activity History. Here, turn off the following checkboxes:
- Let Windows collect my activities on this PC.
- Let Windows sync my activities from this PC to the cloud.
Then, on the same page, turn off the toggle button for the Microsoft accounts for which you want to hide Timeline activities.
How to use Timeline on Android and iOS?
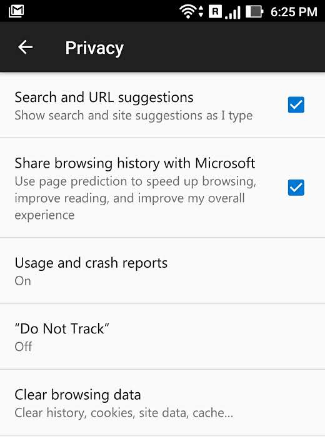
Microsoft designed Timeline to improve the experience across devices. To use it on Android or iOS devices, you must download the Edge browser (Google Play, App Store) and use the same Microsoft account. Using this feature requires a lot of privacy, allowing users to view their mobile browsing history on their computer.
An option called "Share browsing history with Microsoft" should be enabled from Settings > Privacy.