

If you have several users installed on a Windows 10 computer and you don't want the login screen to show some of them, you can hide them from prying eyes with a simple change to the registry.
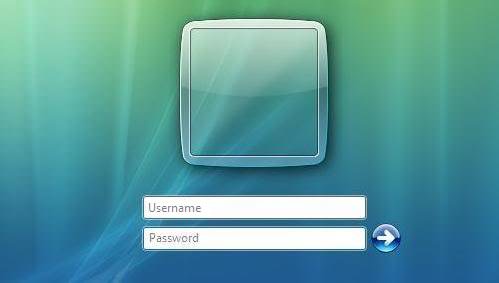
The first step you need to take to hide a user from the Windows 10 login screen is to know the name of the account in question. We're not talking about the full name you've entered on your computer, but another name that your computer uses to identify the user on your computer.
Note: If you are running the Pro version of Windows 10, please skip the next section and go straight to the second section, where you can use the “Local Users and Groups” panel to find out your account name.
Find your account name. (skip this step if you have the Pro version)
1. Press the Win + R keys simultaneously and in the “Run” window that appears, type the word netplwiz and press the “OK” key to open the “User Accounts” tab.
2. On the next screen, you will see all the user accounts on your computer. Click on the one you want to hide and then click on “Properties” to open the Properties window for that user account.
3. On the next screen, you should be able to see the account name in the “User Name” field.
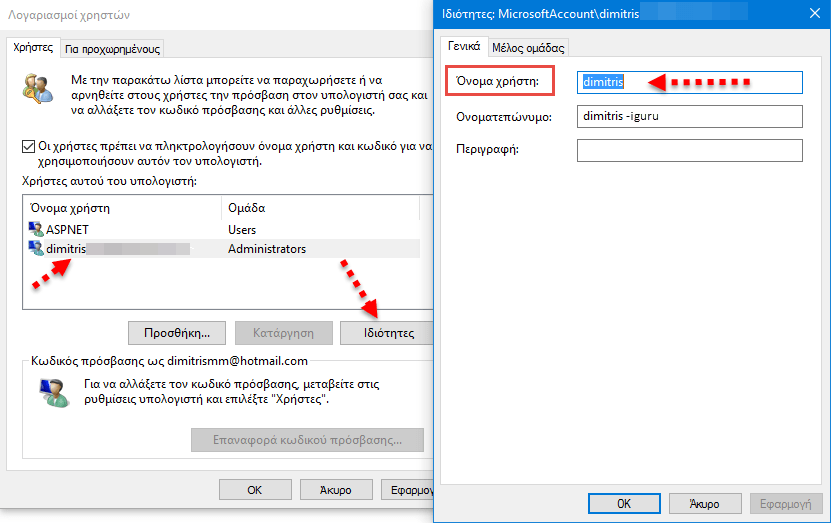
4. Note the account name because you will need it in the following steps.
If you own the Pro version of Windows 10, follow these steps to find the user name:
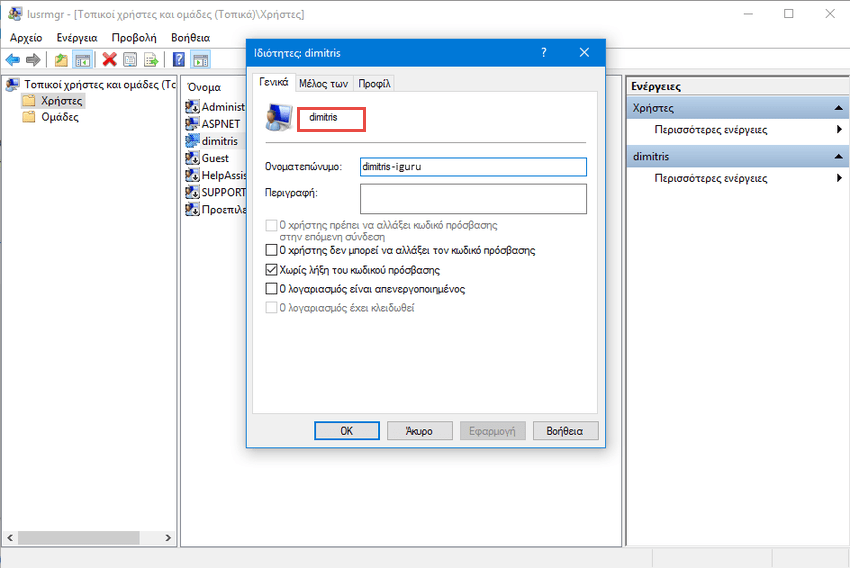
1. Press the Win + R keys simultaneously and in the “Run” window that appears, type the word lusrmgr.msc and press the “OK” key to open the “Local Users and Groups” tab.
2. Click on “Users” and on the right screen you should be able to see the list of users. Double-click on the user name you want to hide.
3. In the User Properties tab that opens, note the user name as shown in the photo below
Hide user account from Windows 10 login screen
1. Open the “Run” utility. To do this, use the Win + R key combination and in the window that opens, type the word regedit and click the “OK” button to open your computer’s Registry Editor.
2. When the Registry Editor opens, follow the following path by clicking on the directories in the left panel:
HKEY_LOCAL_MACHINE\SOFTWARE\Microsoft\Windows NT\CurrentVersion\Winlogon
3. Right-click on the directory named “Winlogon” and select “Create”, then select “Key” to create a new key within this directory.
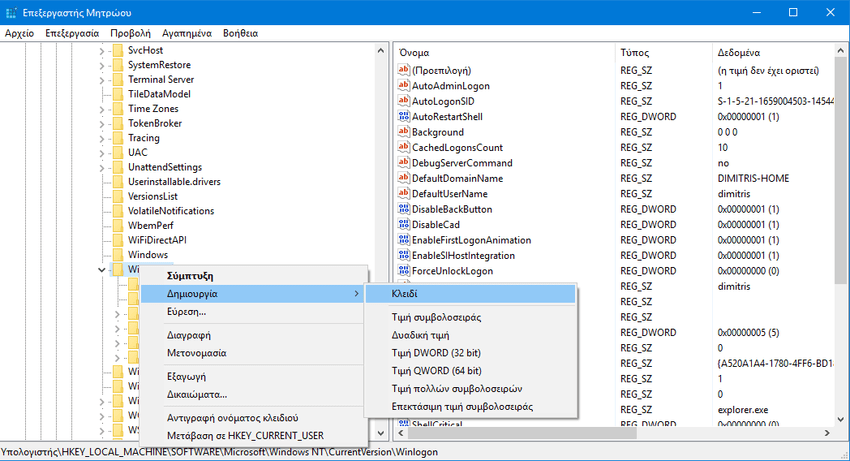
4. Name this key as “SpecialAccounts” and press Enter. [Caution: if the SpecialAccounts key already exists then go to the next step].
5. Right-click on the newly created key “SpecialAccounts,” and select “New,” then select “Key” again to create a new key.
6. Name this new key as “UserList” and press Enter. [Caution: if the UserList key already exists then go to the next step].
7. Right-click on the “UserList” key and select “New,” then select “DWORD (32-bit) Value” to create a new DWORD value in this directory.
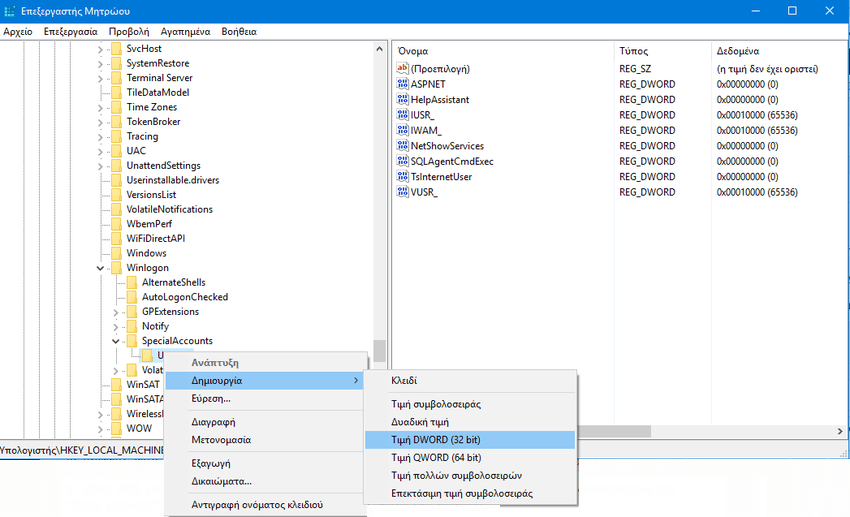
8. Name the new DWORD value the user name you noted from the previous section of this article. Set the “Value data” field to “0” (zero) and click “OK” to save the changes.
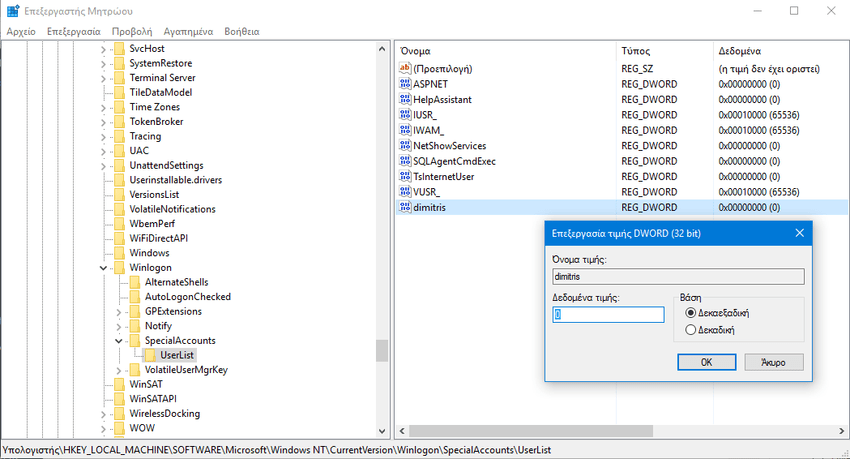
9. Close the registry editor and restart your computer. You should no longer see this account on the login screen.
Even though the account is hidden, it still exists on your computer. You can still sign in with its username and password.
If you want to restore your computer to the way it was before, that is, to have the user name appear on the login screen, all you have to do is delete from the registry what you created in step 8. That is, delete the user name from the “UserList” directory (be careful, delete ONLY the name and not the entire directory).
Good luck.
