

Want to connect your laptop to your TV? Here are some tips for wireless and wired connections.

Connecting to a TV with cable
The most common type of connection for modern TVs is the HDMI cable, a digital standard that carries video and audio. The older HDMI 2.0b standard has enough bandwidth for 4K resolutions at 60 Hz (with HDR signals), while newer HDMI 2.1 devices can do 4K at 120 Hz or 8K at 60 Hz (and more).
Many newer TVs are limited to HDMI inputs, as they have eliminated the analog circuitry required by older media. Fortunately, this type of output is common, as many laptops have full-size HDMI outputs or a smaller Micro HDMI port.
Fortunately, these ports can be used with Micro HDMI to HDMI adapters or cables that feature both connector sizes.
If your laptop doesn't have an HDMI port, you may need to use a USB-C to HDMI adapter. This is the case with many MacBook models.
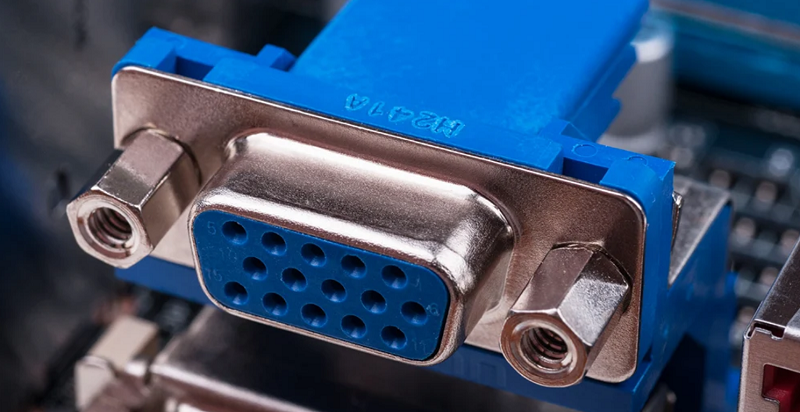
The other “common” connector option traditionally used on TVs is the VGA connector. This older analog connection was once the connection option for computer monitors. Newer TVs don’t have this type of connector, and neither do newer laptops.
On an older TV, the VGA port is often labeled as the “PC” input. If you have a newer laptop with an HDMI output, you can use an HDMI to VGA adapter or purchase a USB-C multiport adapter with VGA.
Since VGA only carries video, it will not carry audio to the TV. So as you can see, it should be one of your last options.
Connecting is relatively simple once you've chosen your cable type. Simply plug the cable into your laptop and plug the other end into the appropriate port on your TV.
With your laptop on, turn on the TV and use the remote to switch to the correct input method. You should see your desktop appear on the TV, although there may be other settings you need to change before things work as you would expect.
Configure your Display Preferences
Take some time to configure your TV so that the resolution, orientation, and position are correct. In Windows, you can go to Start > Settings > System > Display to see your display in the list and change the resolution, orientation, and display mode in the “Multiple displays” drop-down menu.
If you don't see your TV in the list, click Detect and wait. Once your TV is detected, you can adjust its position so that the screen appears in the correct position when you move your mouse.
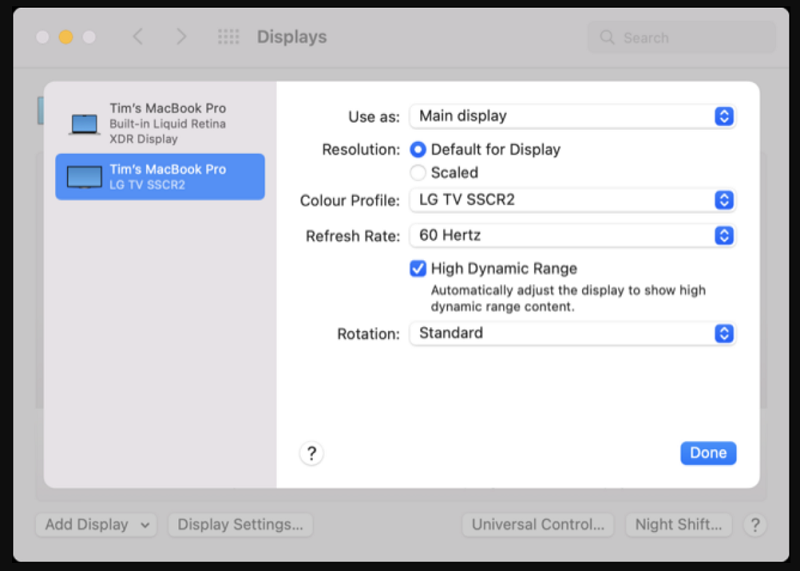
On a Mac, you can do the same in System Preferences (System Settings) > Displays > Display Settings. Click your TV as it appears in the sidebar, then choose a resolution, refresh rate, and toggle HDR mode if available.
You can change the position of your displays by clicking and dragging under the standard “Displays” preference panel.
Wireless connection
Wireless connections are more convenient because they don't require cables. However, they can sometimes provide an unstable experience. Bandwidth is limited on wireless connections, so picture and playback quality may not be as good. Interference from nearby devices can also affect these connections.

On a Mac, you can use AirPlay to mirror your entire screen to an AirPlay device like an Apple TV. Many new TVs already support AirPlay without requiring an Apple TV.
To make a connection, click the Control Center icon in the menu bar at the top of your Mac screen and select “Screen Mirroring,” followed by the device you want to mirror to.
With the Chrome browser, you can also use a Chromecast with a Windows or macOS to “cast” content from your laptop. This works with browser tabs, Chromecast , and Chromecast-enabled apps.
You can cast your entire Windows 11 desktop to a Chromecast, or stick to content like tabs and files.
We hope you found all of the above useful!
Information source: howtogeek.com
