

If you're tired of your computer screen automatically getting brighter or darker with Windows 10 or 11, it's easy to disable it. All you need is a quick trip to Settings. See how to do it.
See also: Windows 10 21H2 also gains ransomware protection

See also: Windows 10 zero-day that grants administrator privileges is temporarily fixed
How to disable adaptive brightness on Windows 10 or 11
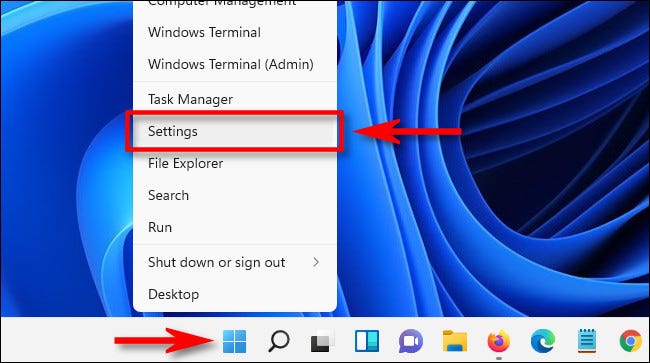
When you are ready to disable automatic brightness, first open the Windows Settings by pressing Windows+i. Or you can right‑click the Start button and select “Settings” from the list.
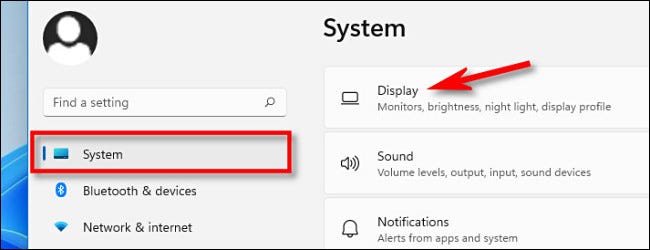
When the Settings, in Windows 10, click System, and then select Display in the sidebar. In Windows 11, click System in the sidebar, and then select Display.
In the “Brightness and Color” section on Windows 10, look below the Brightness slider and uncheck the box next to “Automatically adjust contrast based on the displayed content to help improve battery” or “Change brightness automatically when lighting changes”. If you see both options, uncheck both.
See also: Windows 10/Windows 11: How to convert PNG images to PDF?
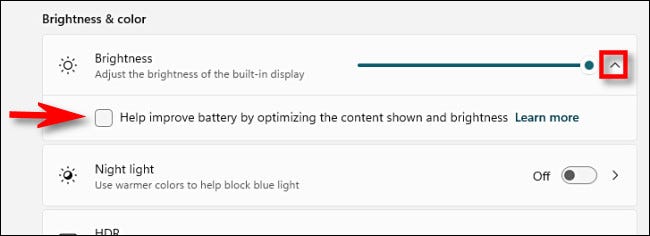
In Windows 11, click the small arrow next to the «Brightness» slider to expand a small menu and, then, deselect the «Help improve battery by optimizing the content shown and brightness» option.
If you see the “Change brightness automatically when lighting changes” label, deselect that as well.
After this, close the Settings. From now on, the brightness of your screen will always remain as you set it under manual control.
Information source: howtogeek.com
